Administering assessments in the form of a calendar is a popular collection method. Timeline Followback assessments have been developed for all sorts of behaviors. To ease data entry for these types of forms, instruments in COINS can be configured to be displayed as a calendar. The calendar display type currently does not work with Self Assessment.
Calendar Display Instrument Setup
To change an instrument to be displayed as a calendar, select Calendar for the display type from the instrument's options instead of the default view of Full.
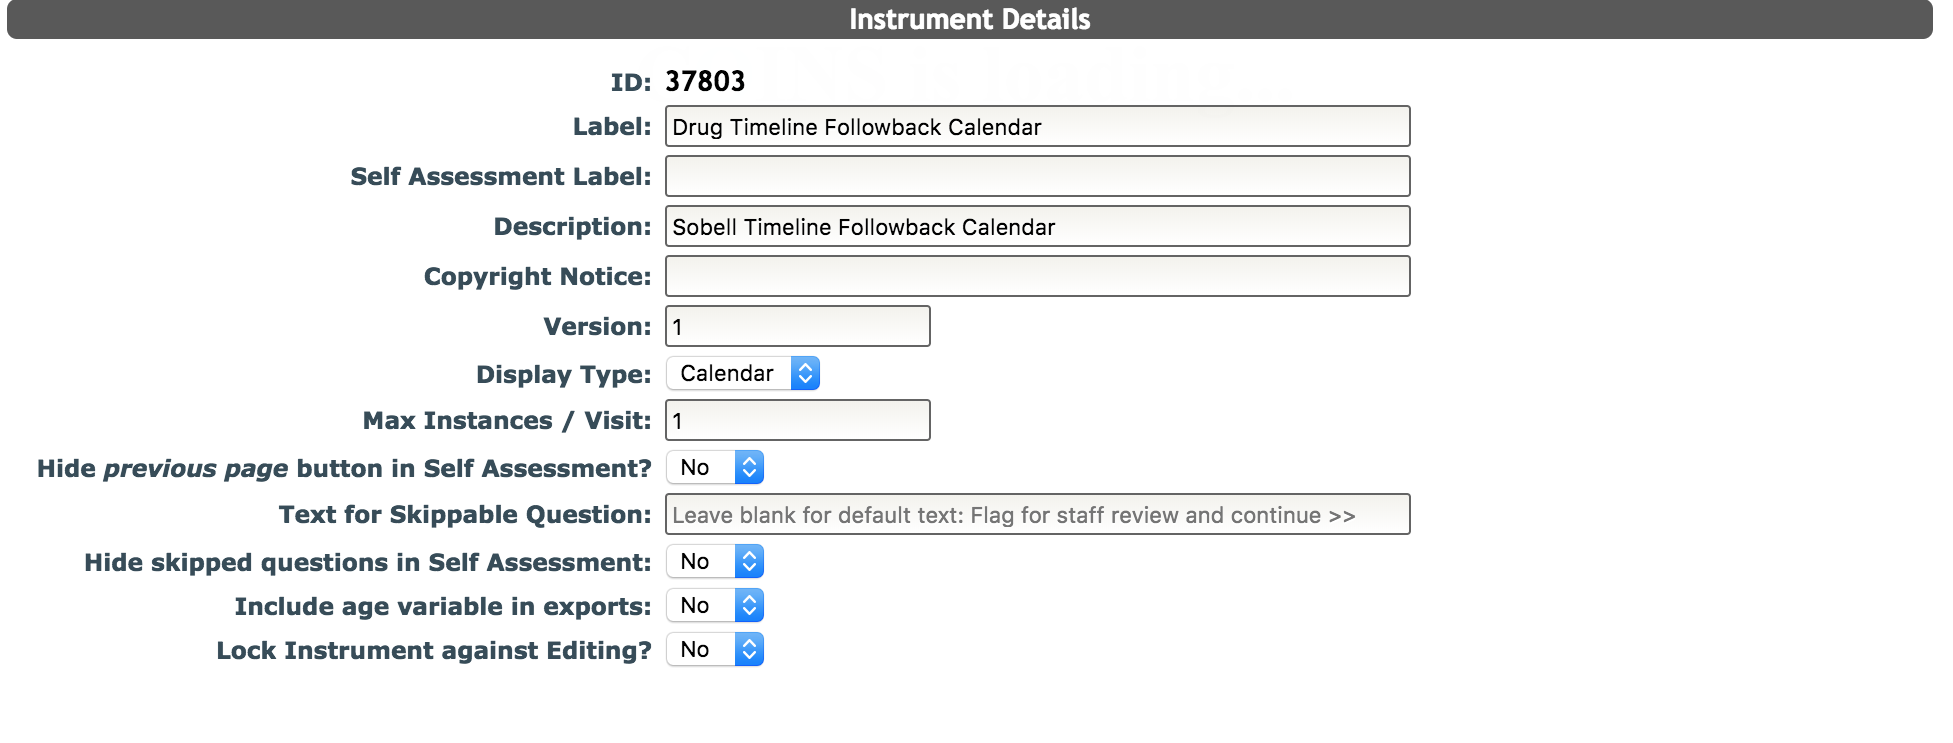
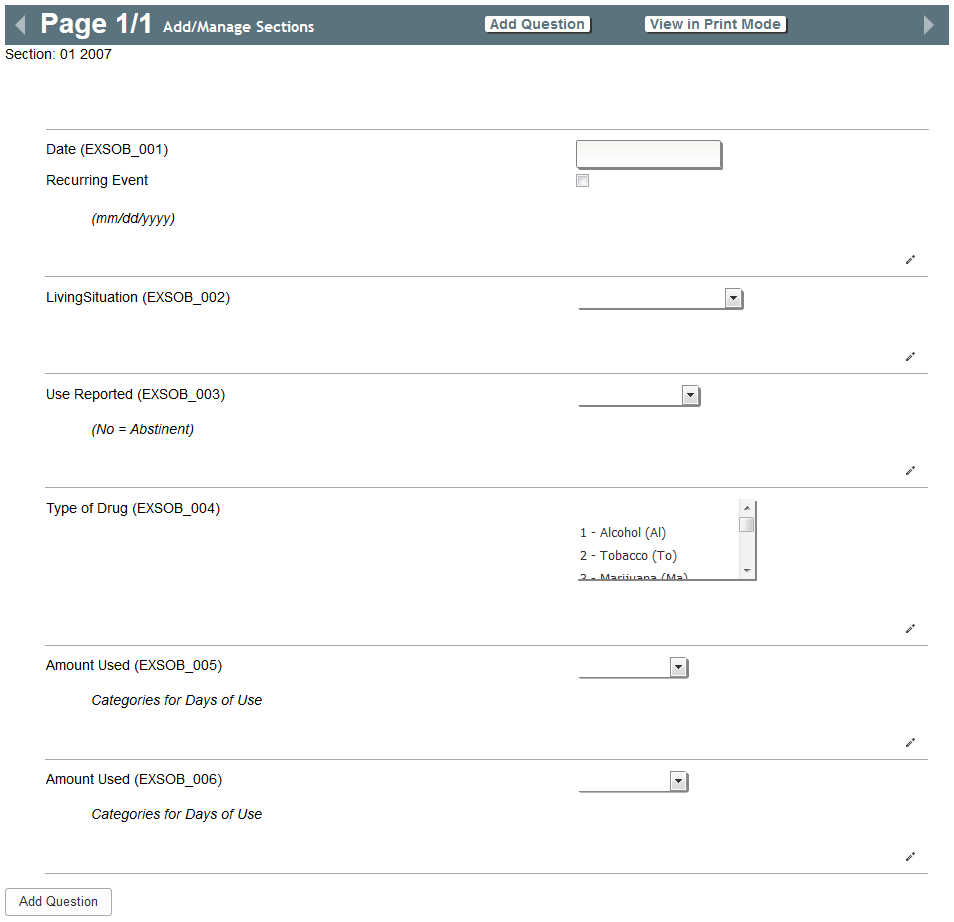
For the calendar display to function properly, it is important that the first question for the instrument to be a text field for date. The Recurring Event checkbox will automatically appear on the first question after it is created. Questions after this can be configured as they normally would. Every question for the instrument will be available for entry for each date on the calendar.
Calendar Data Entry
Once the instrument is set to be displayed as a calendar, when opened in data entry it will be formatted as one. You will be asked to complete the data entry cover sheet as you would for any other data entry assessment.
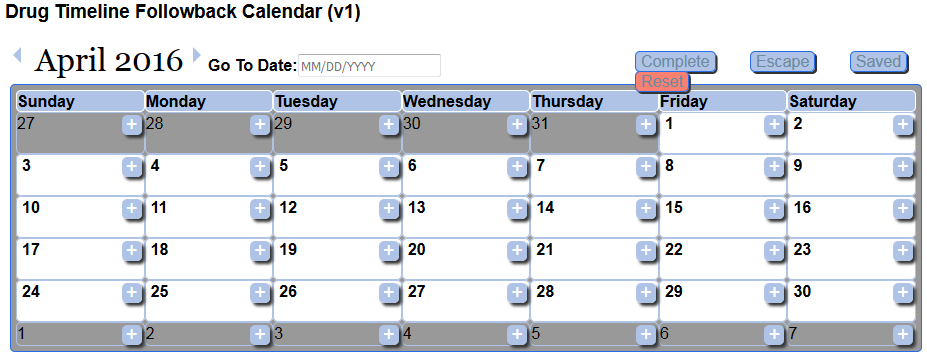
The calendar will open on the current date by default. You can jump to a different date by clicking the Go To Date field and selecting a date from the calendar. To enter data on a date, click the +. This will open a popup window to enter data into.

The questions created for the instrument will be displayed here for entry. The first field should always be date. This will automatically fill in the calendar date selected for entry. Fill in the proper information for the remaining questions and click the + at the bottom of the first section.
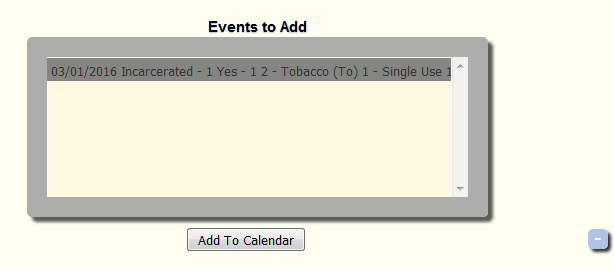
After clicking the plus, the evens indicated in the data form will be added to preview box for events to be added. Multiple events can be added by continuing to complete the questionnaire and adding them to the preview box. Click Add To Calendar to add the event. Select an event in the preview box and click the - in the bottom to remove an event. Events will appear on the calendar after they have been added.

For events that repeat, check the Recurring Event check box.
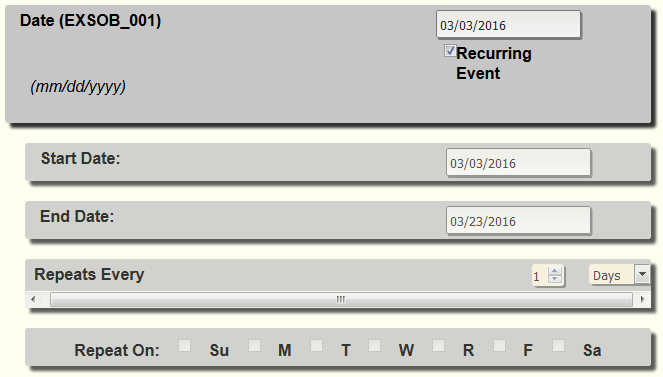
Now you can specify the start and end date of the repeat window, the frequency and if week or month is selected, you can specify which days it should repeat on by check the box for the correct days.

The calendar will save periodically, but you can click Save to save any unsaved responses. Click Escape to leave without keeping any unsaved changes or to exit, Complete to complete the calendar, or Reset to clear all data.
Exporting Calendar Data
Calendar data exports the same as any other assessment data, however it can be difficult to understand. Because of this, there are two way it exports best. The first, most familiar way is through the Query Builder Legacy export. When exporting through Query Builder, you will need to select the Up and Down export orientation option. This will allow for the export of the question instance in it's own column. This is helpful for matching events to dates.

In the example above, the question instance in column S is the piece that ties all the events together. In the first row for date 3/1/2016 the question instance is 1. This means all other questions that have an instance of 1 are tied to this date. A simple script can be written to match all the instances together, giving you a better view of the data.
The second export option is study portal assessment export tool.

This tool can group exports by a question. When choosing date, all events will be grouped together by the event date, resulting a clean, organized export.
Comments