Export Options
Assessment exports have a lot of options of help optimize the customization of your downloadable data file. This section of the article will explore each area of the export page.
Basic Export Format Options
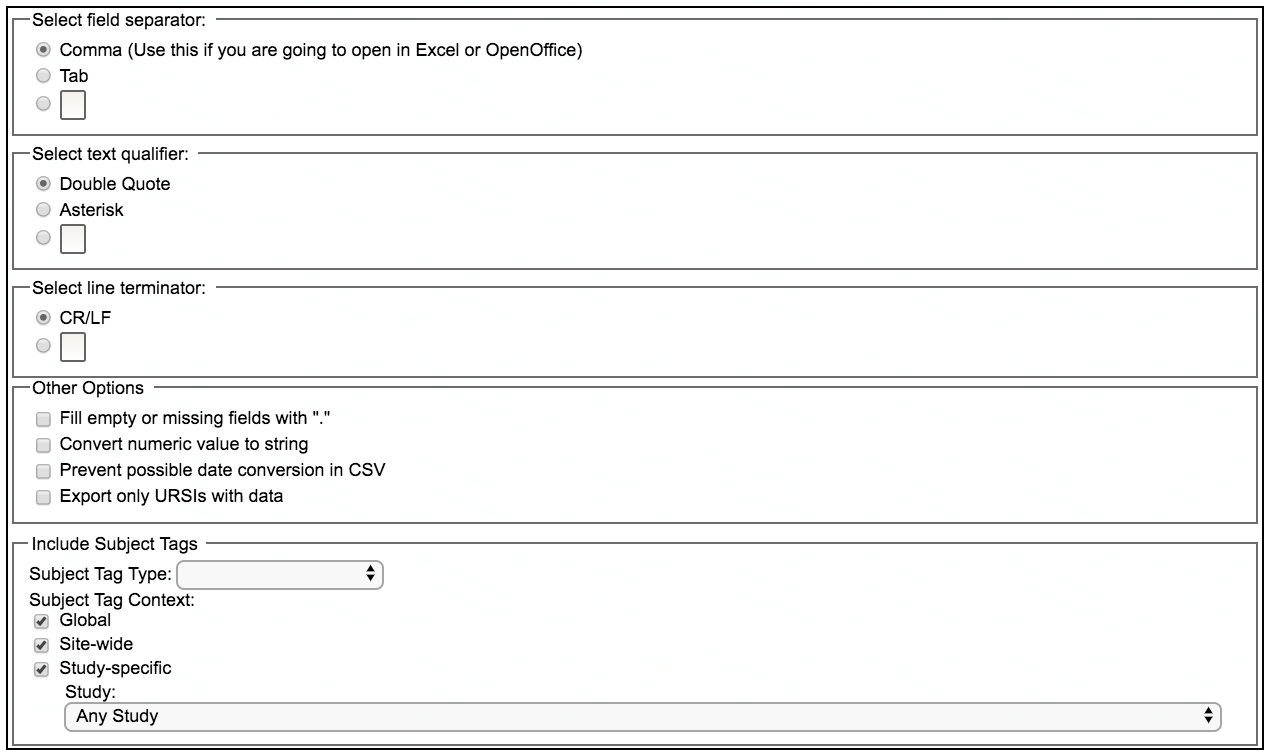
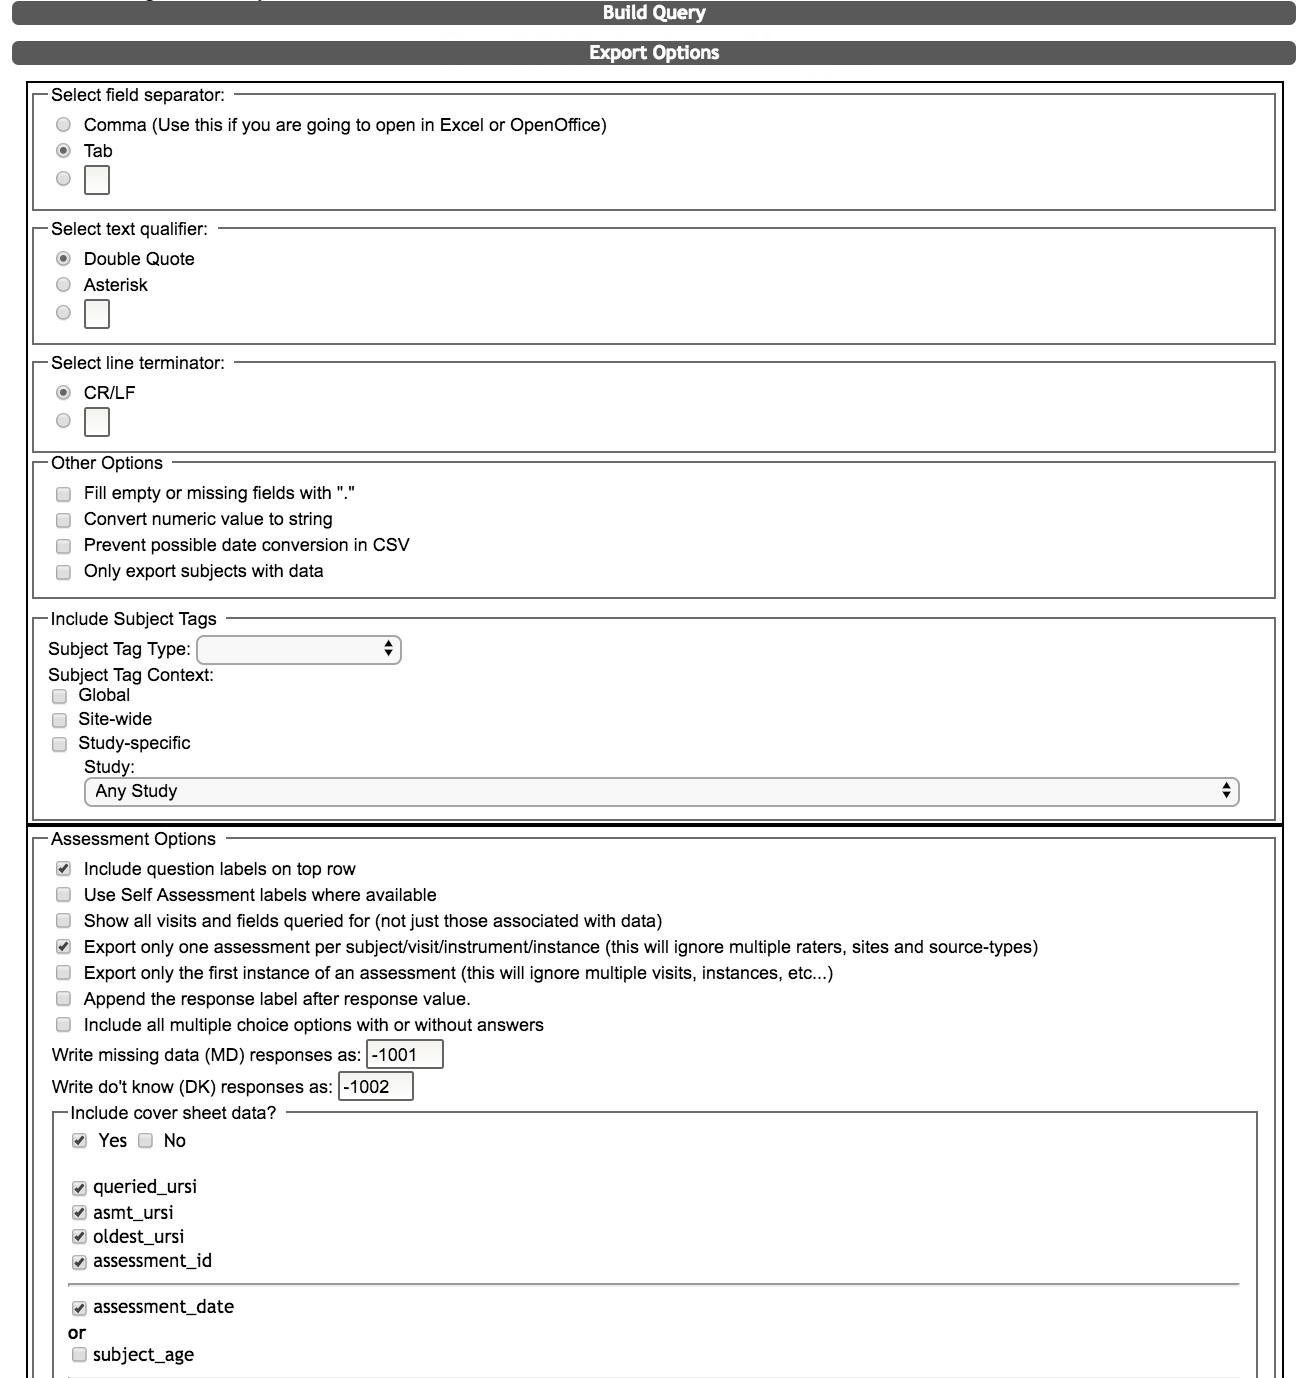
When exporting Assessment data, you can choose the field separator, text qualifier and line terminator.
Other options include filling in empty cells with a period and exporting numeric values in quotes as a string. For numbers that have dashes, you can also prevent them from converting into dates (ex. 5-7 converts into May-7). You can also exporting only URSIs with data, which is helpful if the subject list that you queried with is large.
Additionally, you can choose to include Subject Tags in the export. When exporting Subject Tags, you will be required to chose the Subject Tag Type, Subject Tag Context and the Study. Note: There will be no subject tag export options for queries using anonymization IDs.
Assessment Options
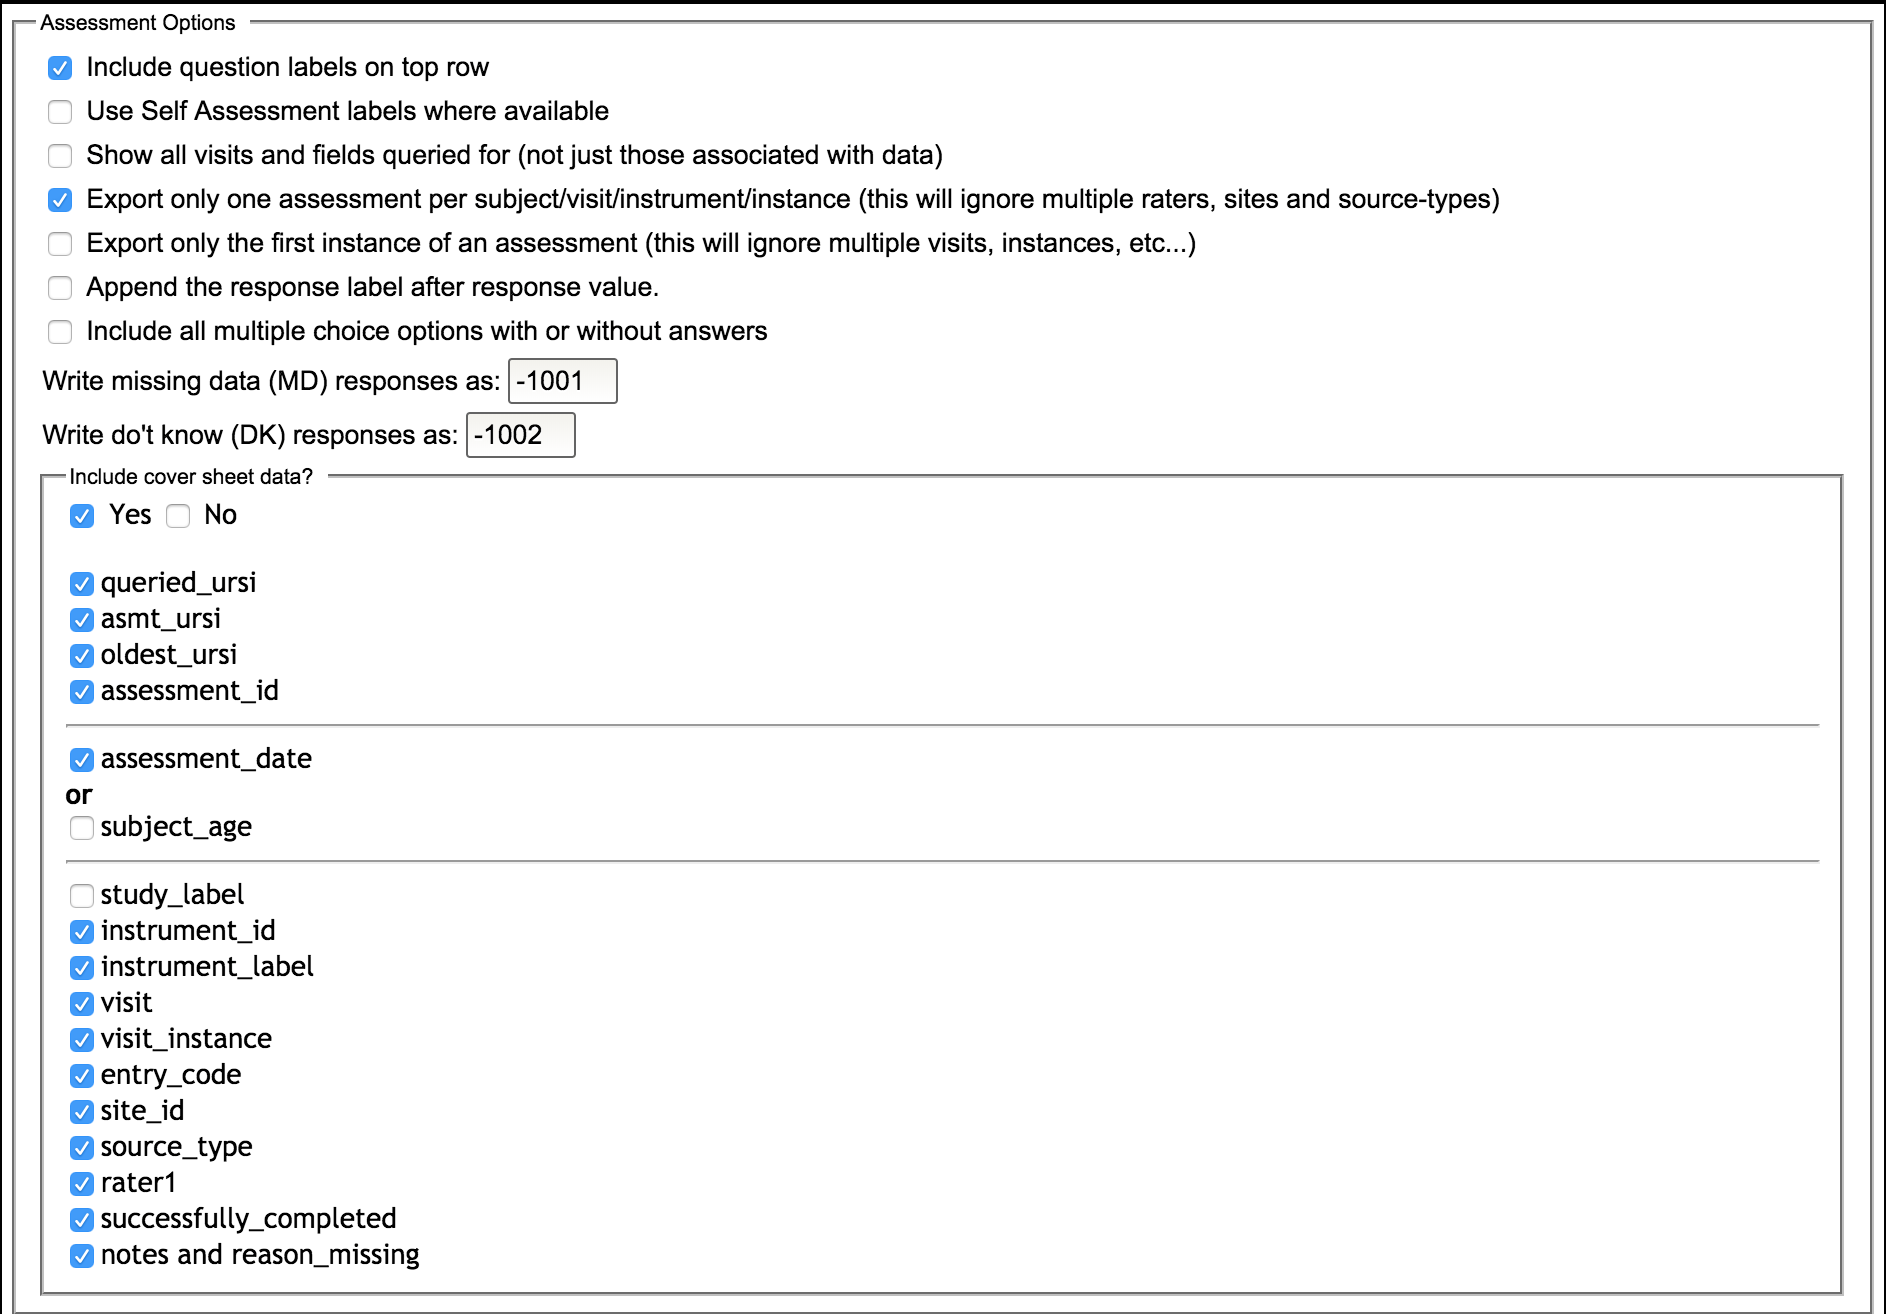
In this section, you will be given the following options:
- Include question labels on top row - this will print out the question text for each question queried in the exported csv. If this is unselected, the export will only contain the question IDs
- Use Self Assessment labels where available - this will export Self Assessment labels under the question IDs.
- Show all visits and fields queried for (not just those associated with data) - this is useful if you would like to see a full picture of the collection for the selected subjects (i.e., it will display instruments and visits in which data was not collected).
- Export only one assessment per subject/visit/instrument/instance (this will ignore multiple raters, sites and source-types) - this is a feature useful for cases when an assessment was entered twice for the same visit, but with a different source-type or rater or site. In that case, two assessments will be treated as separate events but they will both have a segment instance of 1. This can complicate the exported results, so with this option you can ignore the subsequent assessments of the same visit/visit-instance.
- Export only the first instance of an assessment (this will ignore multiple visits, instances, etc...) - if you are running a query and do not care on which visit the data were collected, you can select to export only the first assessment that the system comes across which meets the criteria specified in your query.
- Append the response label after the response value - this will export the response stored numeric value as well as the label associated with the value.
- Include all multiple choice options with or without answers - This option allows you to export all of the possible response instances of a multiple choice question regardless if there is data associated with the response.
- Write missing data (MD) responses as/Write don’t know (DK) responses as - here you can choose the value exported for missing data and don’t know responses (which are default options in ASMT Data Entry for all canned response questions).
- Include cover sheet data? - if you select Yes, you will be able to choose which cover sheet data you want included by clicking the checkboxes next to the following items:
- URSI or Anonymization ID -if you choose to query your data using URSIs, you will not be shown the option to export your data by anonymization ID (as shown in the example image above). If you are querying your data by URSI, you can choose queried ursi, asmt ursi, oldest ursi, and/or assessment id. If you choose to query your data using anonymization id, you will not be shown the options to export your data by URSI (example image below).

- Assessment date or subject age
- Study label
- Instrument id
- Instrument label
- Visit
- Visit instance
- Entry code
- Site id
- Source type
- Rater1
- Successfully completed
- Notes and reason_missing - if an assessment is listed as Incomplete/Missing (on the assessment cover page in ASMT or closed as missing in the Progress Report), the reason that the assessment is incomplete/missing will be exported in this column. These options are added to the study by selecting Edit Incomplete/Missing Reasons from the Admin tab in ASMT.
- URSI or Anonymization ID -if you choose to query your data using URSIs, you will not be shown the option to export your data by anonymization ID (as shown in the example image above). If you are querying your data by URSI, you can choose queried ursi, asmt ursi, oldest ursi, and/or assessment id. If you choose to query your data using anonymization id, you will not be shown the options to export your data by URSI (example image below).
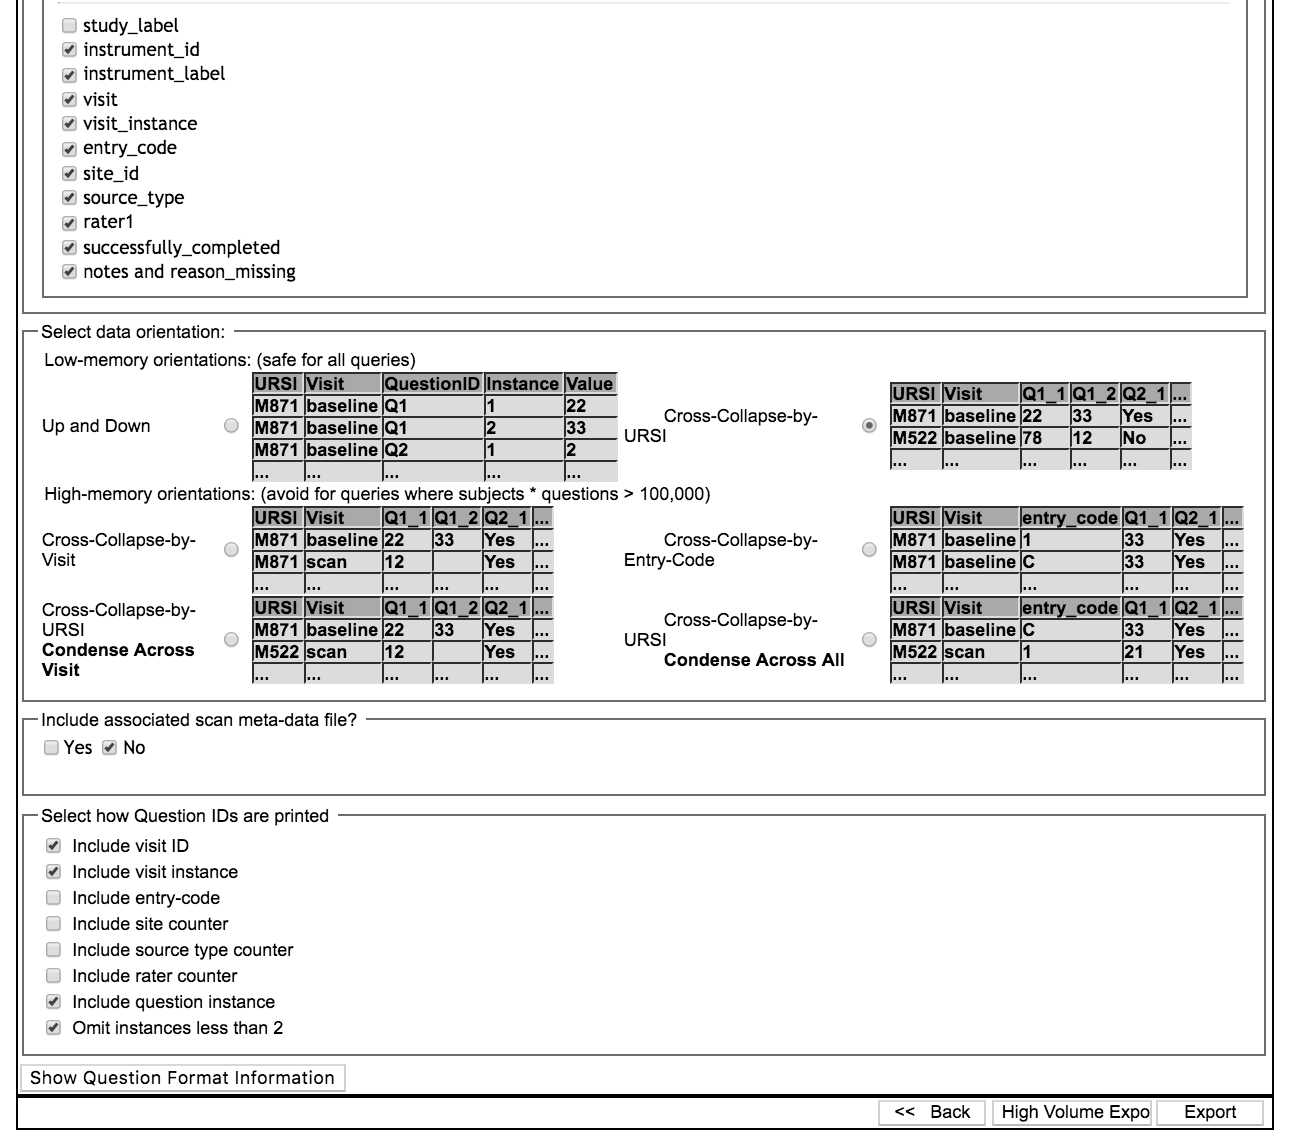
Select Data Orientation:
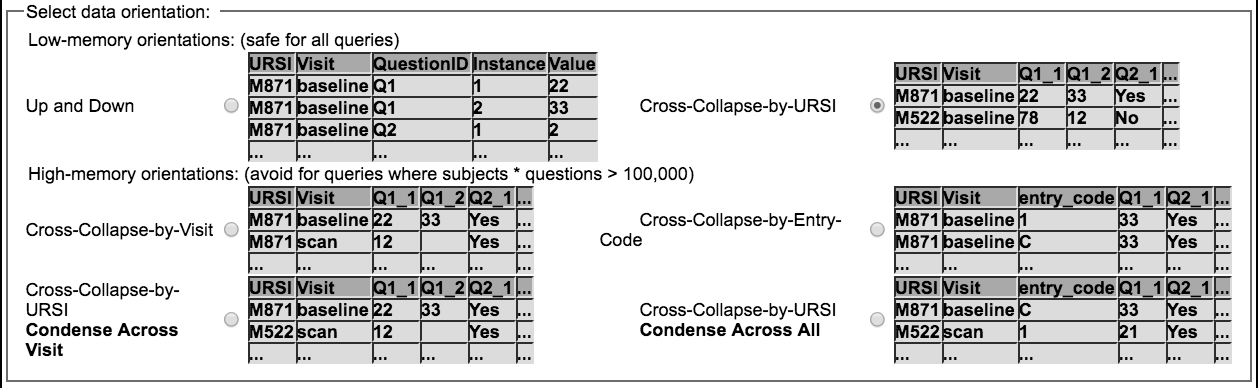
- Cross-Collapse by URSI - one row per URSI
- Cross-Collapse by Entry Code - at least one row per URSI and one row per entry code.
- Up and Down - questions are in a column instead of row. URSI on multiple rows.
- Cross collapse by visit - URSI on multiple rows. Visit in column instead of row.
- Collapse By URSI: Condense across Visit - Condense all available data across visits so that the left most columns contain as much data as possible.
- Collapse By URSI: Condense across All - condense all available data across visits and entry codes (1,2,C), so that data is condensed into left-most columns.
Include associated scan meta-data file
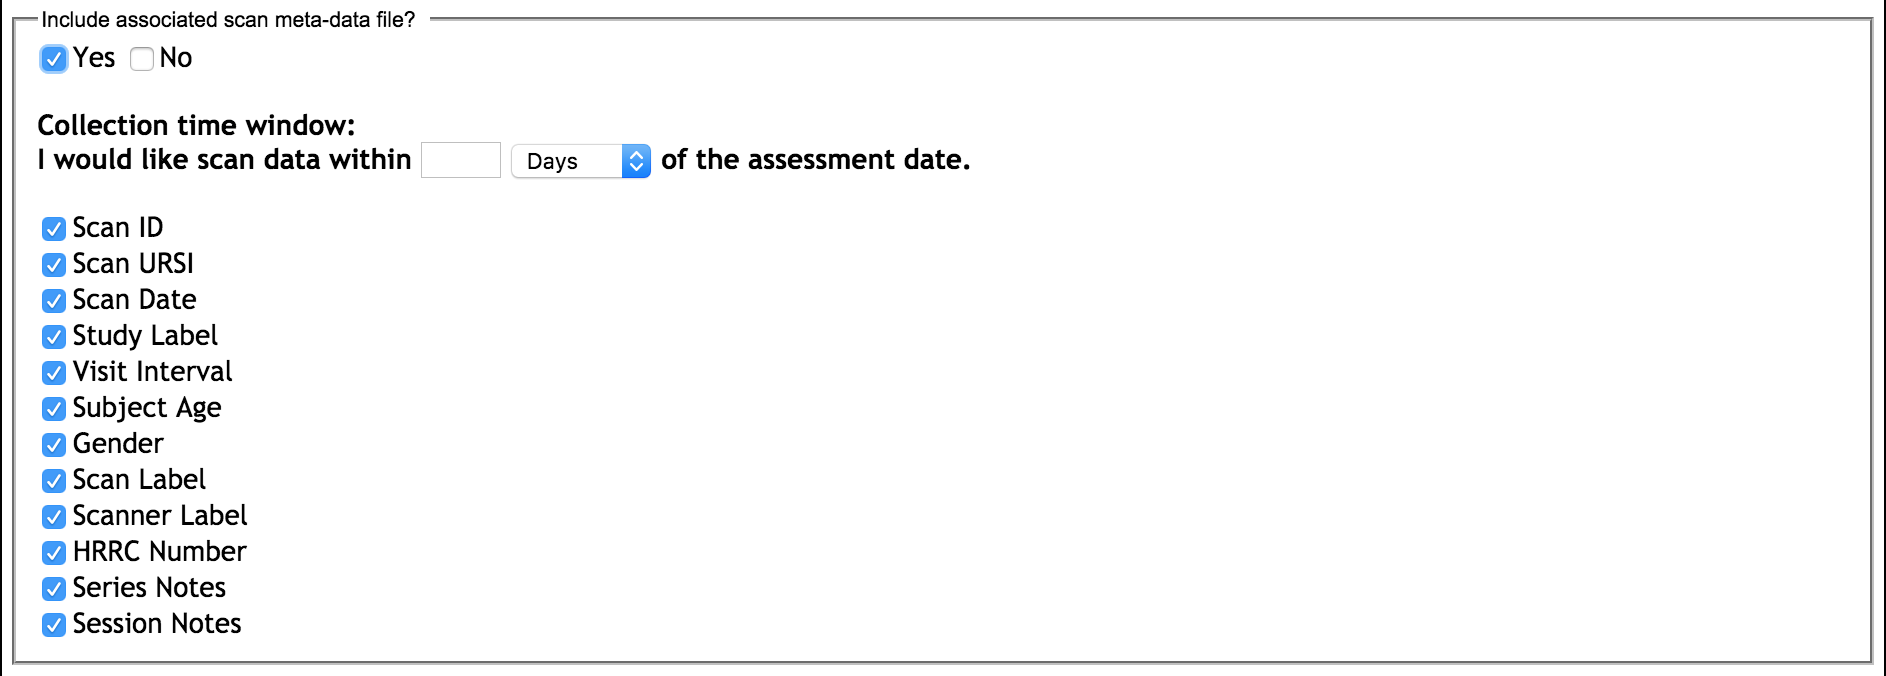 Query Builder will allow you to pull associated scan meta-data with your assessment queries. Click the checkbox next to Yes and you will be able to specify the Collection time window. The collection time window is meant to allow you to pull data within a certain time frame related to the assessment dates in your query. For example, if you enter 30 days as your time window, all scans that were collected 30 days before and 30 days after the assessment dates in your query will be included. Any scans collected outside of that window will not be included. Then, choose which meta-data to include in the scan meta-data file.
Select how Question IDs are printed
Here you can decide how much information you would like to include in the column headers of your export.
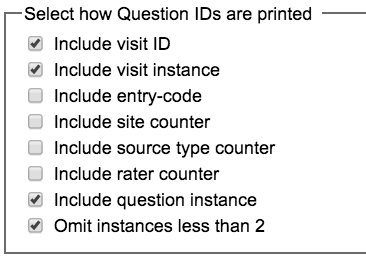
- Include visit ID - the visit label, such as Baseline, Visit 1, etc., will be appear at the beginning of the question ID
- Include visit instance - this is often 1; indicates the number of the assessment performed in case the assessment is administered more than once per visit
- Include entry-code - the entry code of the assessment (1=First Entry, 2=Second Entry, C=Dual-Entry/Tablet Complete, F=Dual-Entry Conflicting Fields, M = Missing etc.)
- Include site counter - if the same instrument was applied to the same subject for the same visit at multiple sites, this counter will increment through those sites.
- Include source type counter - if the same instrument was applied to the same subject during the same visit with multiple source types, this counter will increment through those source types.
- Include rater counter - if the same instrument was applied to the same subject during the same visit by multiple raters, this counter will increment throug those raters (this is also a good indication of different studies entering the same information)
- Include question instance - the sequence number of the question ID when the question is asked more than once; often used on medication logs.
- Omit instances less than 2 - if the question instance is 1, the _1 will not be appended to the end of your question ID
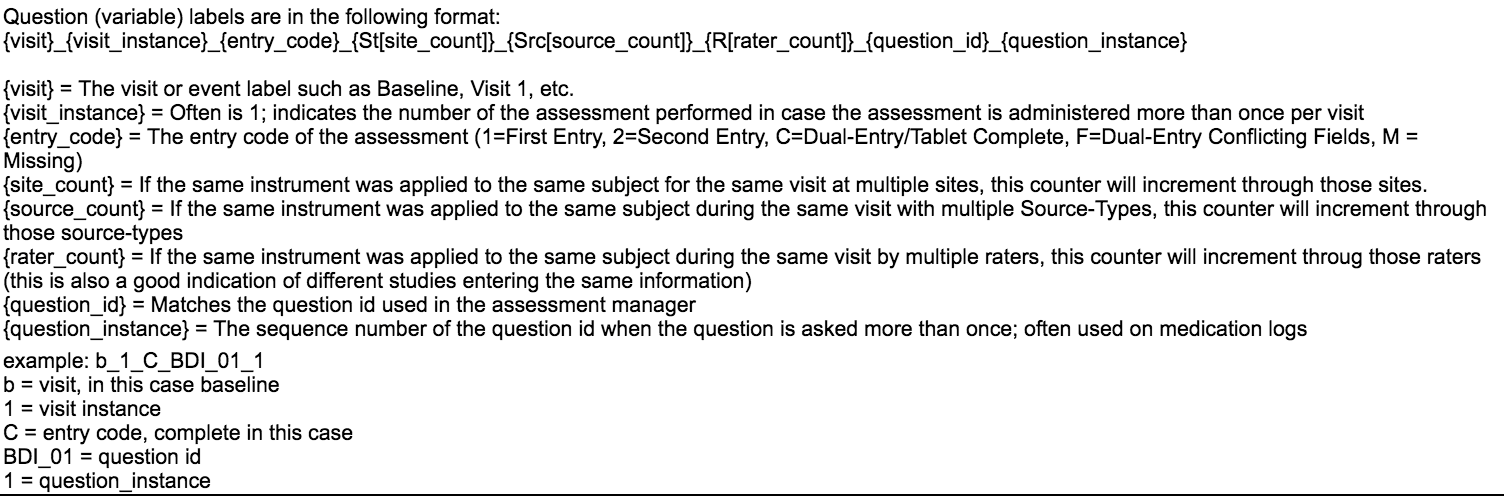
Examples of question ID elements and formats can be found at the bottom of the Export Options page.
Click Export to start your data download or <<Back to return to the Data Preview page. You can also click High Volume Export to switch back to the default export option.
Comments