The event scheduler uses the study's subject types, visits and instruments to allow you to set up a schedule for each study visit. If you do not have these items set up please go here to see how to get started. The event schedule determines what assessments should be collected by subject type and visit. Think of this process as setting up your study protocol. Event schedules can be used for auto queuing, for staff and participant calendars, and to view the Progress Report
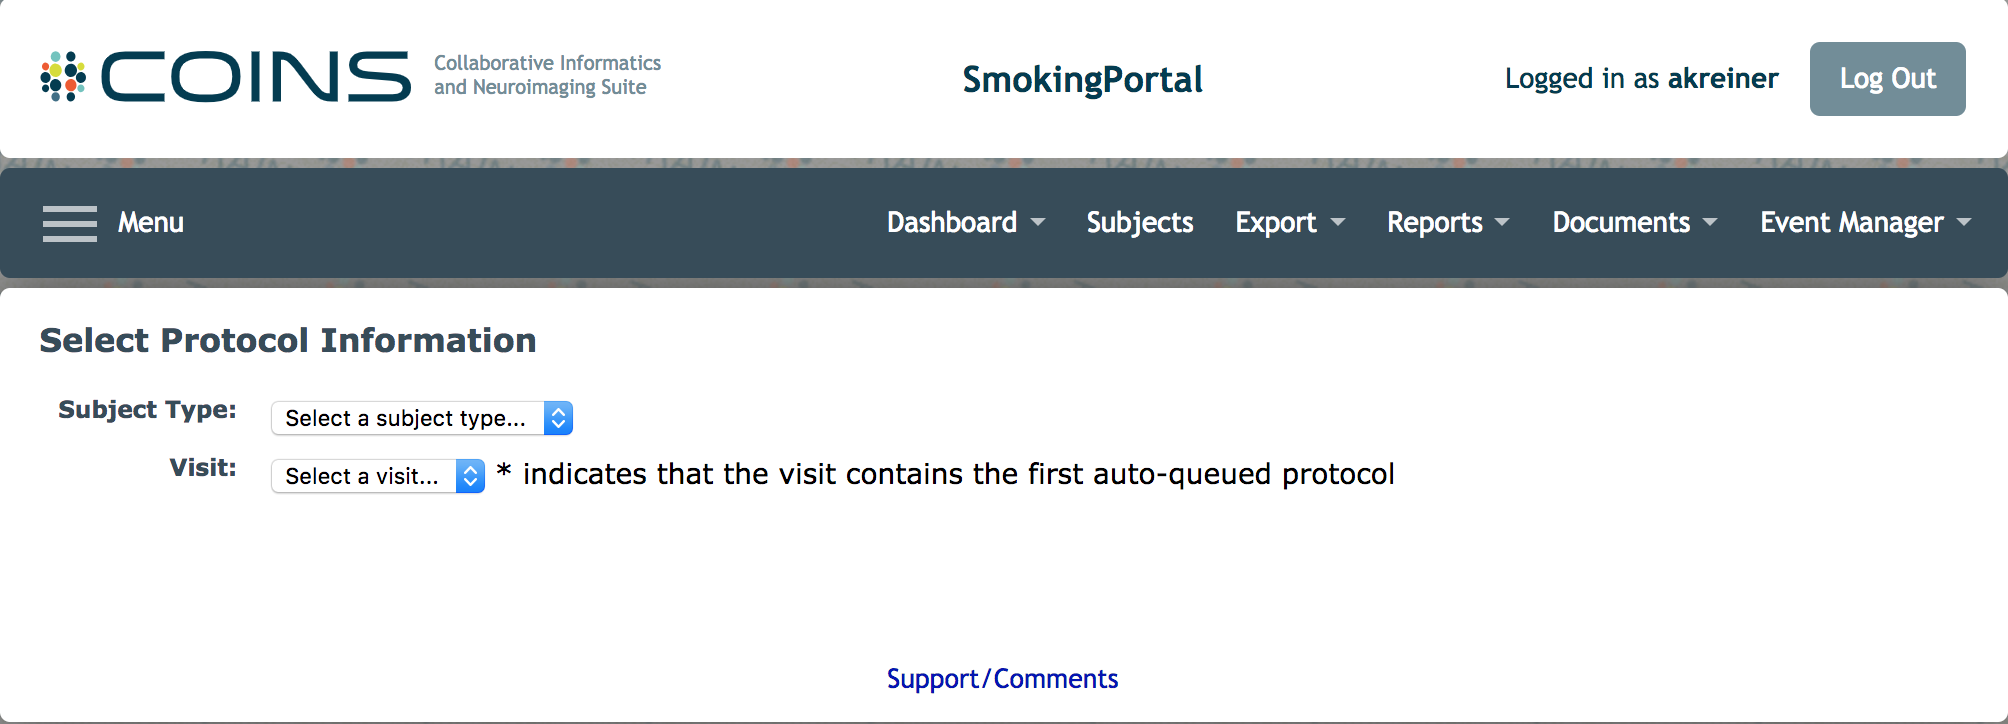
In your study portal select Schedule Event from the Event Manager menu. Select the subject type and the visit for which you would like to create the protocol. An asterisk will indicate which visit contains the first auto-queued protocol (more on this below).

Basic information for each protocol will be listed as well as any existing protocols will be listed here, otherwise, there will be an indicator saying there are no existing protocols for this subject type and visit.
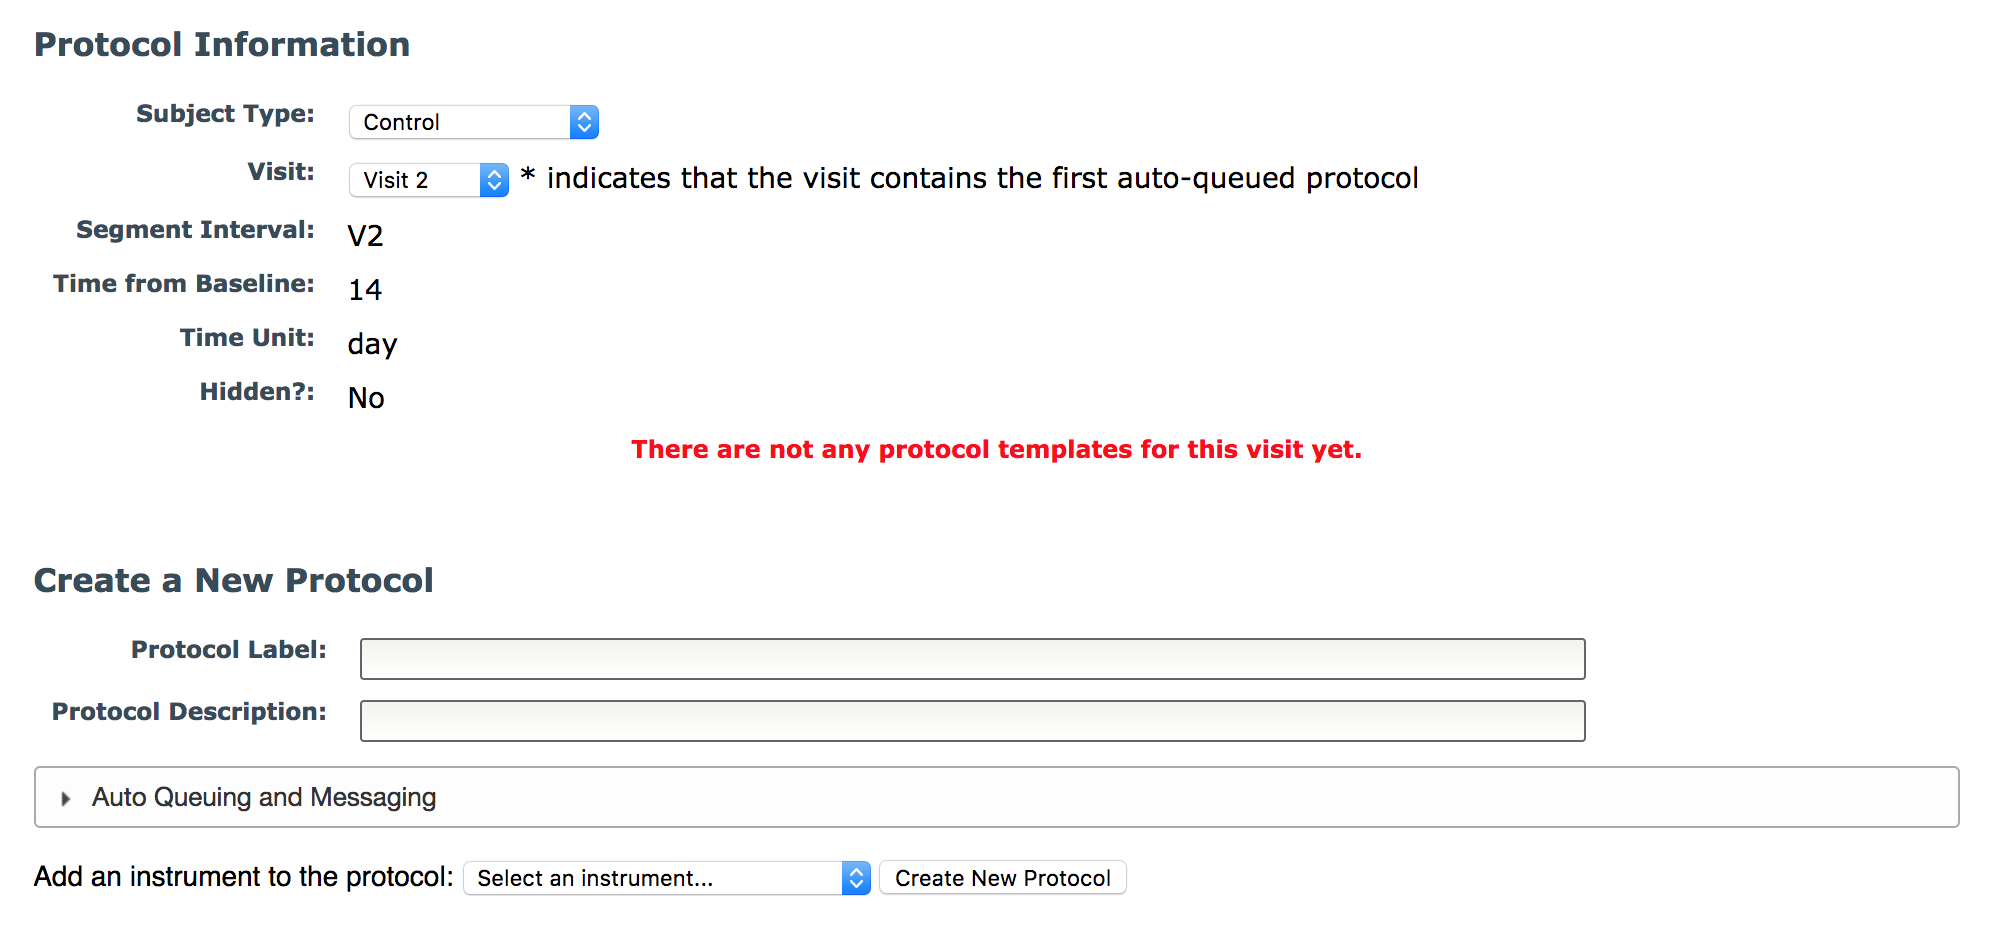
To create a new protocol add a label and description. For auto queuing or p2 Calendar messages, click the Auto Queuing and Messaging header to display the options.
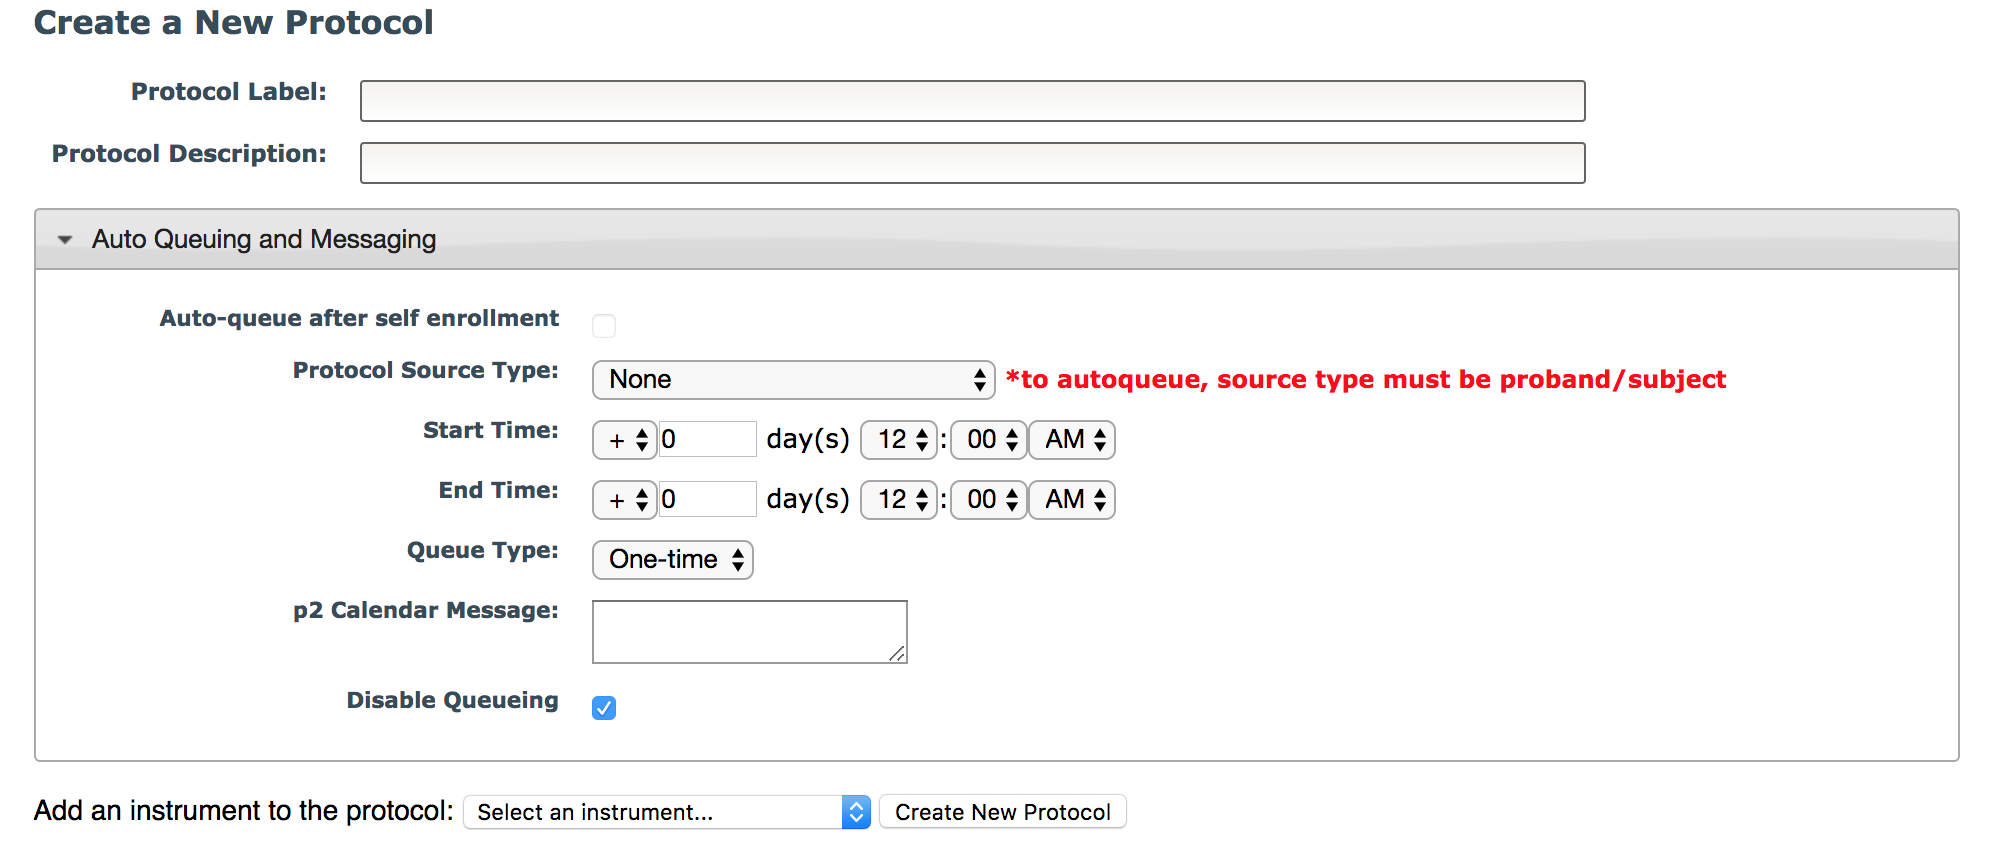
First, you will see the Auto-queue after self enrollment checkbox. Select this box if you would like this visit's instruments to be administered automatically after self enrollment. If you cannot check this box, it means that another visit for this subject type has already been selected. Hover over the disabled checkbox to see which visit has already been configured for auto-queueing after self enrollment.

If a visit has been selected to auto-queue after self enrollment, the Protocol Source Type will automatically be set to Proband/Subject and the following options will be removed:
- Start Time and End Time
- Queue Type
- Disable Auto-Queuing checkbox

For all other protocols, you will need to select Protocol Source Type. For auto queuing, you will need to set the protocol source type to Proband/Subject because this is the only source type that allows for auto queuing. Set the start and end days and times to create a window for when the protocol questionnaires can be accessed. The start and end days are calculated from the visit's time from baseline. If the study is not using auto queuing, source type, times, and queue type can all be left at default values.
You will then need to choose your queue type from the drop down box.
- One-time: this will administer all the Instruments in the queue one time
- Recurring: this will start the Instruments over as a new instance every time the Recurring Queue is opened. Instruments in the queue must have an Instance larger than 1 to work. Instrument Instances can be changed in the Instrument Properties.
- On-going: this type keeps the Instrument in a Pending Status and editable until it has been completed. This typically works best with calendar assessments that are used continuously.
To set a default p2 Calendar message, add text to the field. This will be displayed on the participant's p2 Calendar for all confirmed events. Once the visit is confirmed, the message can be edited from the event.
If you would like to disable queueing for this protocol, click the checkbox next to Disable Queueing. This will allow you to have a protocol to display events on the calendar without auto-queuing.
Once all fields are completed, select an Instrument under the Add an instrument to the protocol drop down. Once an instrument is selected, click Create New Protocol to add the protocol details and the first instrument. Continue to add instruments by selecting them from the list.
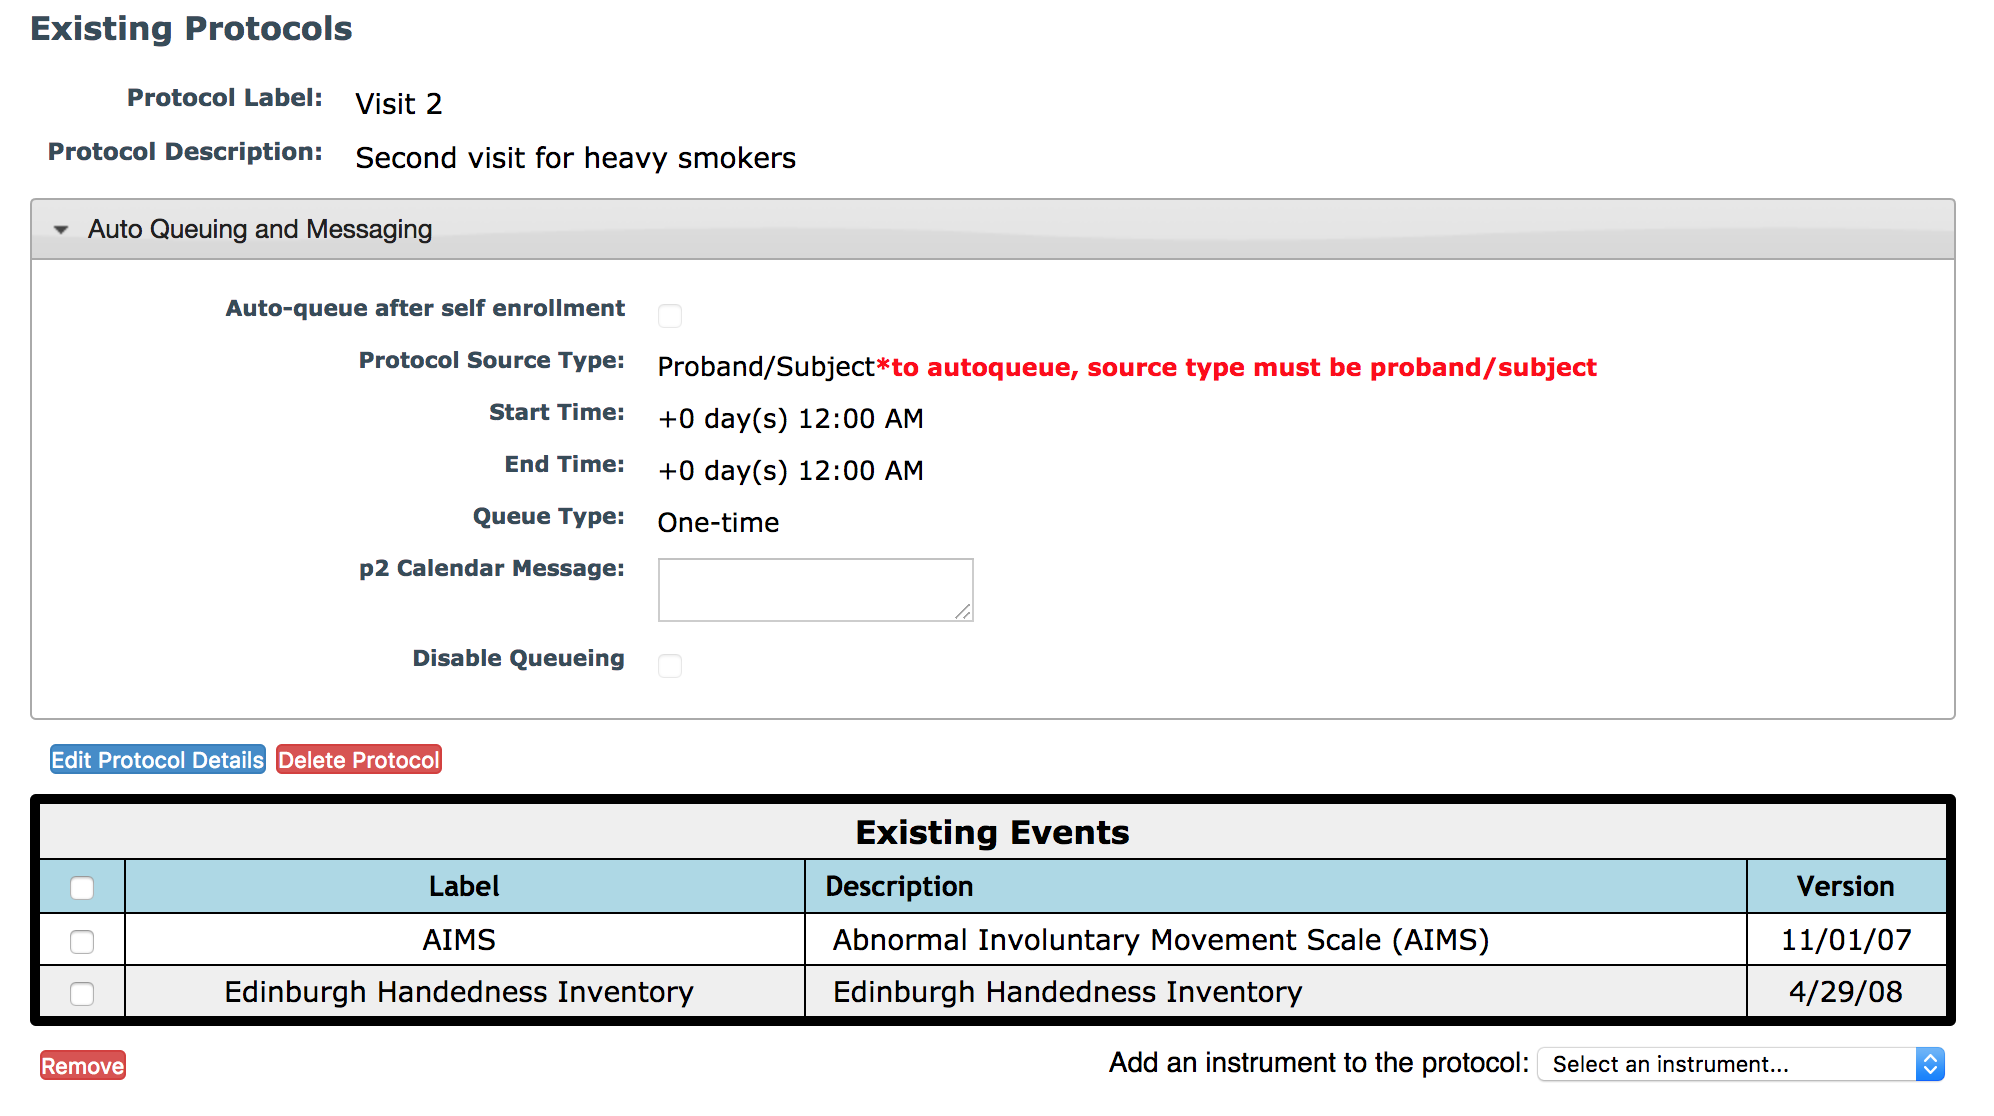
When auto queued, instruments will be presented in the order they appear in the protocol. They will also appear in this order in the Progress Report. Instruments can be deleted from the protocol by selecting the check box next to an instrument and clicking Remove. To remove an entire protocol, click Delete Protocol. If the protocol you are deleting is currently queued for a participant, you will receive a message showing you the pending assessments and participant queues that are associated with the protocol. If you choose to delete the protocol, these assessments will be sent to the review queue and all calendar events associated with the protocol will be removed from the calendar view, including past events. The list of instruments can be rearranged by dragging and dropping them. If you have rearranged the protocol instrument order, you will need to re-save the list by clicking Save Protocol Order.

If you would like to make changes to items other than the protocol instrument list, click Edit Protocol Details.
Repeat the steps above for all subject types and visits in your study. Many studies use the same battery of instruments for the same visits for multiple subject types. Due to this, existing protocols can be copied across different subject types and visits within the same study. Select the appropriate options for copying and click Submit.

You can create multiple protocols but continuing to complete new templates and copying protocols for this subject type and visit.
Comments