To enter a new subject select Enter a new subject from the Subjects menu. To add the participant to your study, complete the fields on this page. All fields marked with * are required. Please enter the subject's information carefully. The following details are used to enroll the subject in a study, match to previous enrollments, and contact the subject for any radiology incidental findings. Upon study closure, this PHI can be "unlinked" and made no longer available for protection of privacy.
Alternatively, a subject can also self enroll.
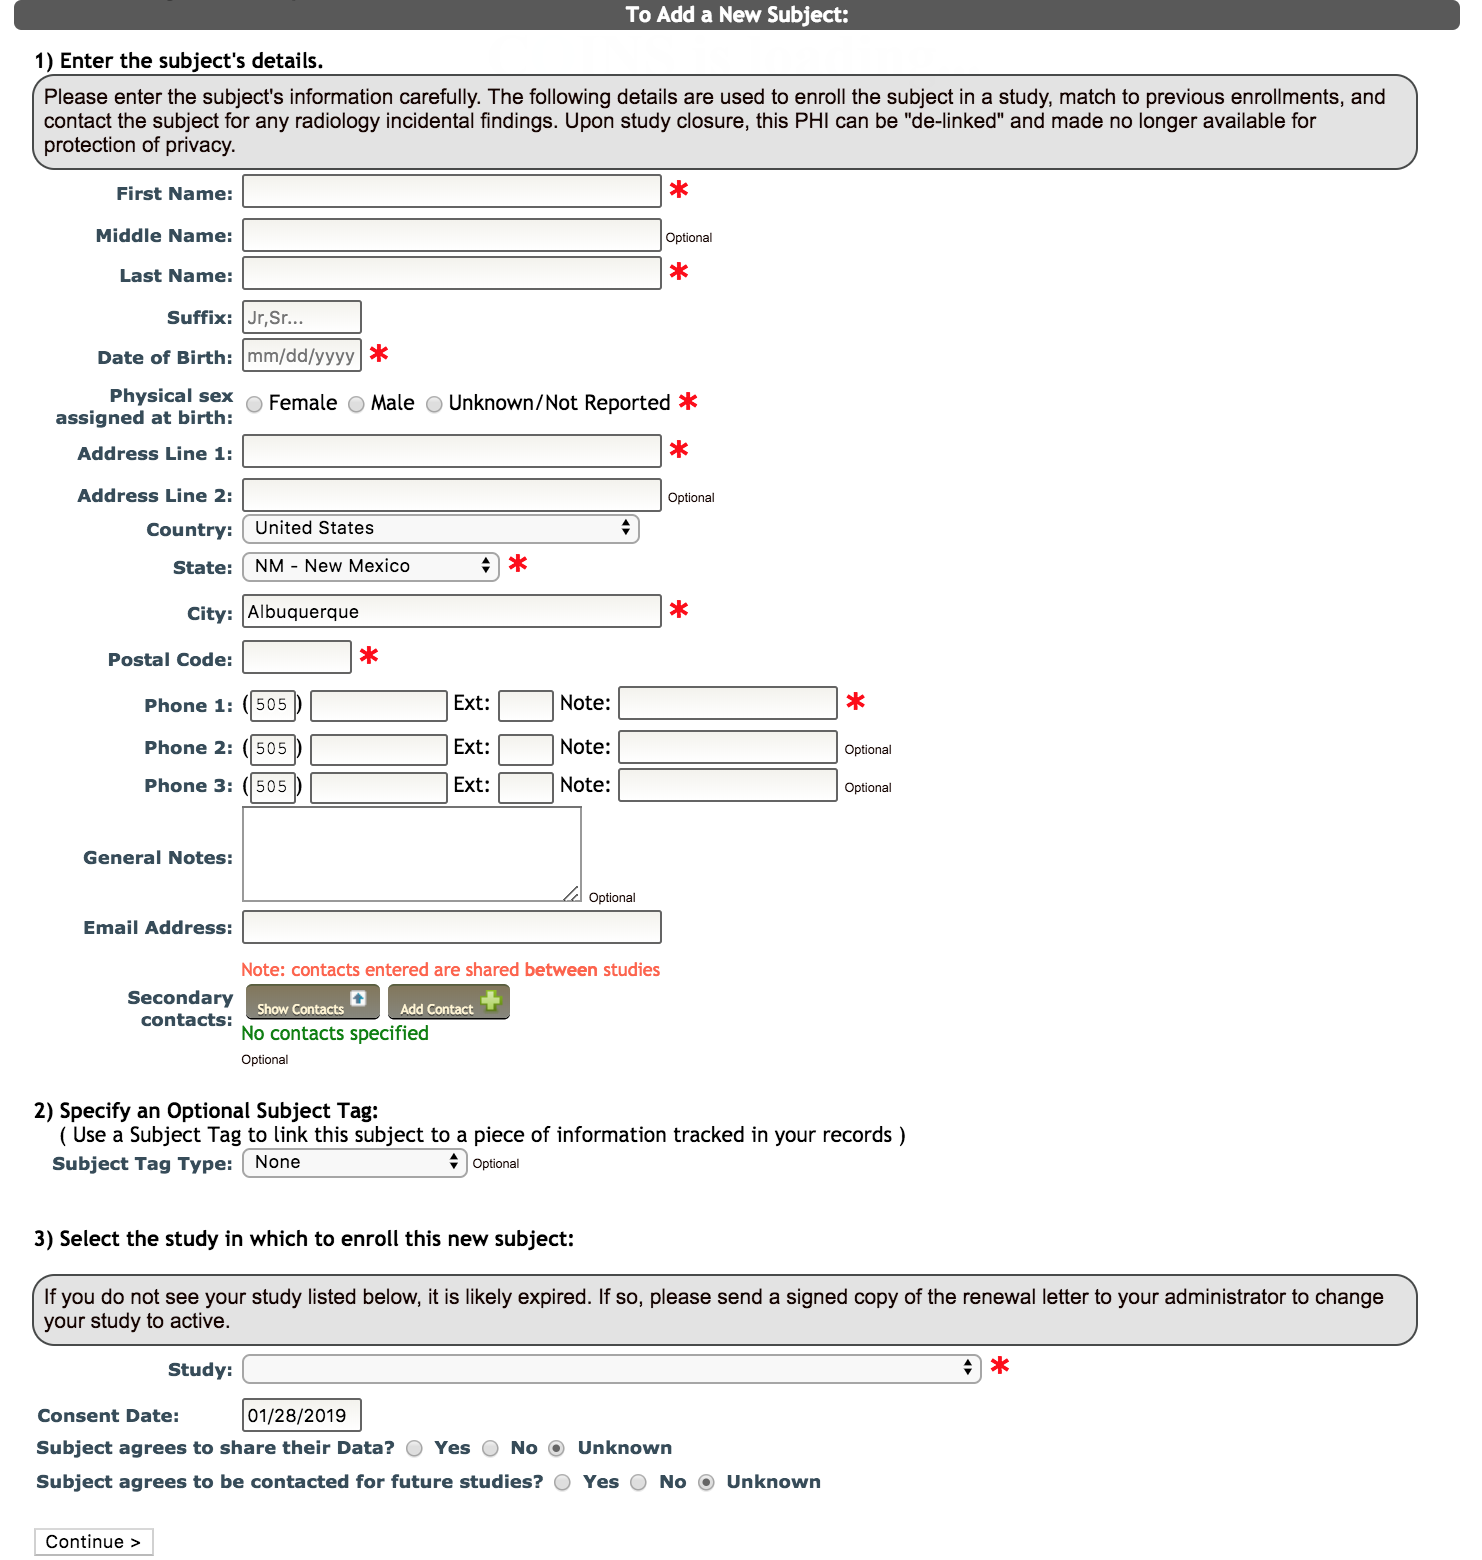
Step 1: Enter the Subject's Details
- First Name
- Middle Name (optional)
- Last Name
- Suffix (optional)
- Date of Birth - MM/DD/YYYY
- Physical sex assigned at birth
- Address Line 1
- Address Line 2 (optional)
- Country - defaulted to United States
- State
- Note: If you select a country other than the United States, the State drop-down will be disabled and will auto-populate to Other.
- City
- Postal Code
- Phone 1 - (XXX) XXX-XXXX format and optional notes can be added
- Note: If you select a country other than the United States, the automatic formatting for all phone number inputs will change to a single phone number field.
- Phone 2 (optional) - (XXX) XXX-XXXX format and optional notes can be added
- Phone 3 (optional) - (XXX) XXX-XXXX format and optional notes can be added
- General Notes (optional) - It is extremely important to remember that any notes that you leave on the subject details page can be seen by everyone who can access this subject or may access them in the future. Do not put any sensitive information in the notes section.
- Email Address (optional)
- Secondary Contacts (optional) - this information can be used in case of an emergency or if the study requires contact that extends beyond the participant. It is important to remember that Secondary Contact information is shared across studies, the same way Notes are. Click here for more information on Secondary Contacts.
Step 2: Specify an Optional Subject Tag
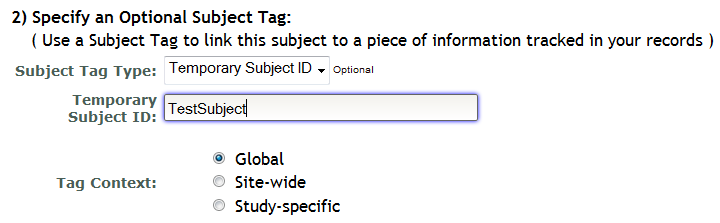
After you have entered all of the required subject details you will proceed to Specify an Optional Subject Tag. If your study tracks subjects by an identifier other than the URSI number you can use this feature to document the link between the URSI and that ID. Subjects can be looked up by either URSI or Subject Tag in most places. You are not required to have a Subject Tag.
Subject Tags can be added at time of enrollment. Only one tag can be made when enrolling, but more can be added after enrollment. To create subject tags at enrollment select the Subject Tag Type (contact the NI Team to create any that are not present), enter the desired value, and then select the appropriate Tag Context.
You can go here for more information on adding individual Subject Tags or here for bulk imports.
Step 3: Select the study in which to enroll this new subject
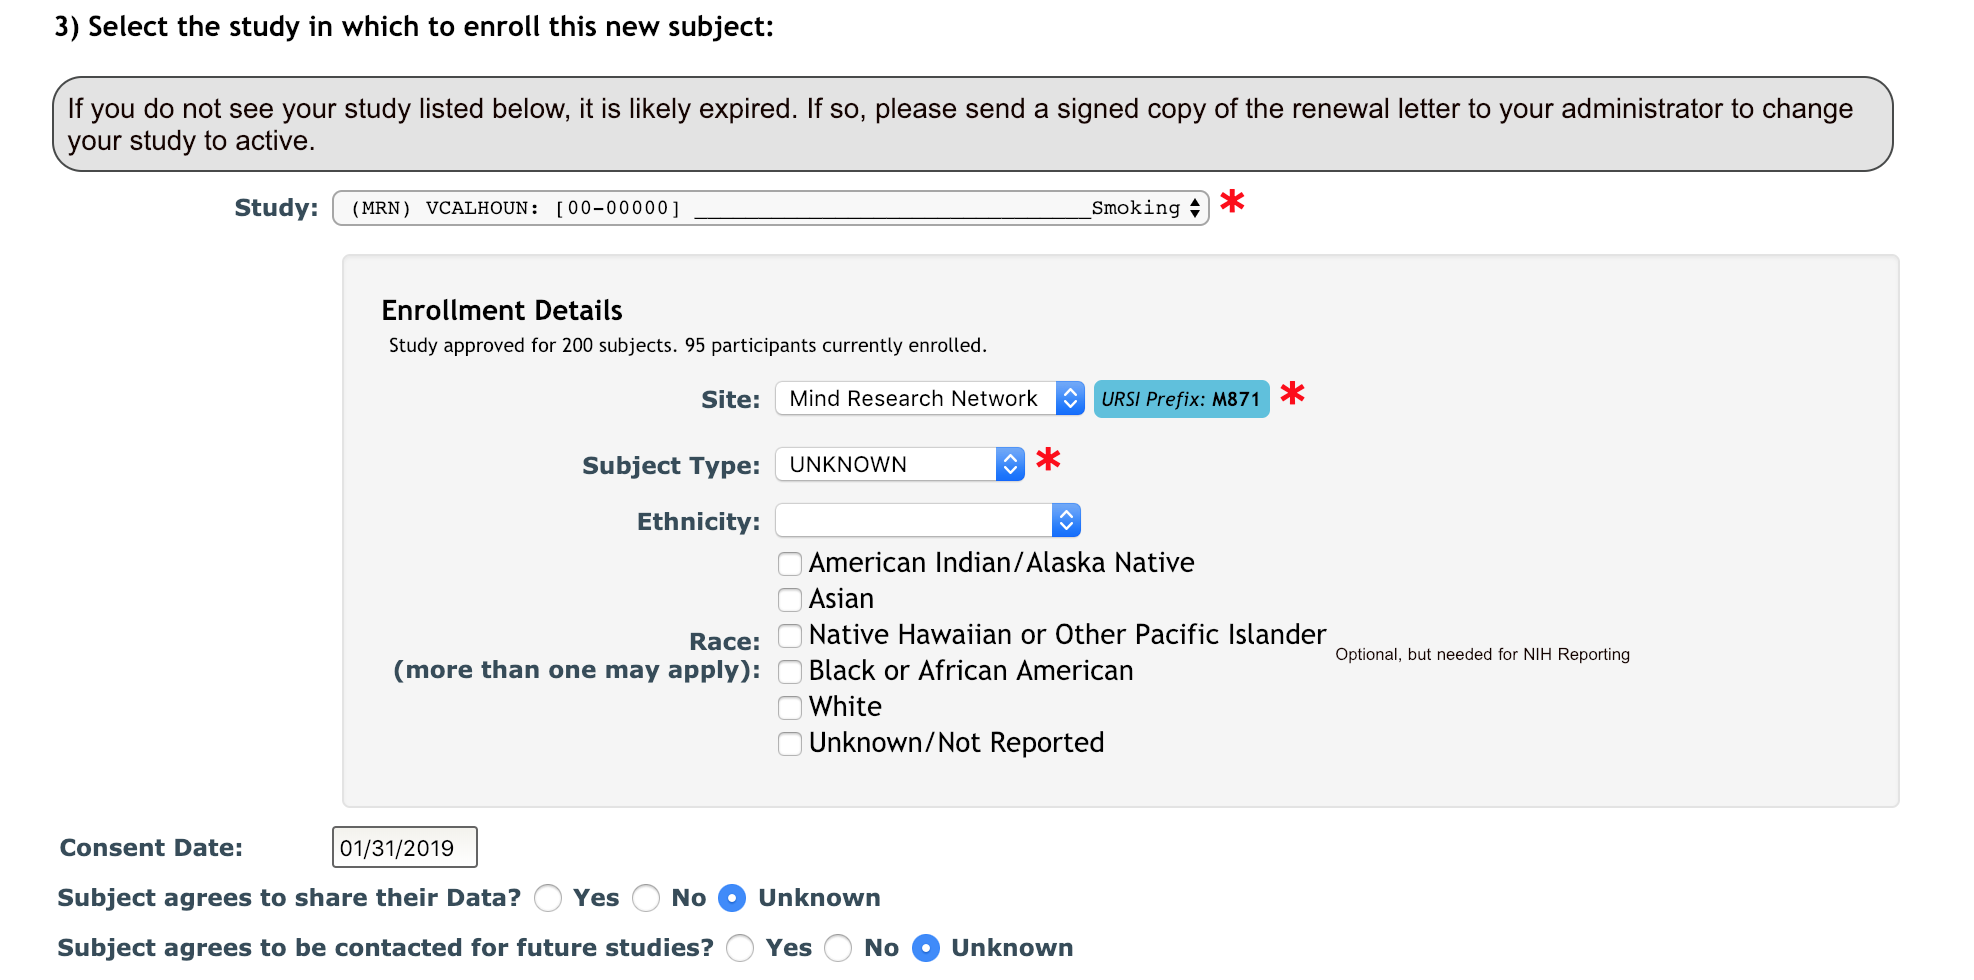
The next section is where you will Select the study in which to enroll this new subject. You will only see the studies for which you have permissions in this drop down menu. Those permissions are set by your site admin, program manager or PI. If you cannot see a study that you believe you should have permission to see, contact your program manager. Another reason your study may not be on the menu is because it is closed, expired or suspended. Check the Study Details page to see the status and IRB expiration date for your study. You will now see the number of approved subjects and the number of subjects currently enrolled. When the study is up to 90% enrollment, you will receive a pop up message indicating the enrollment percentage. This is for your information, you will not be prohibited from enrolling when after you reach 100% enrollment. If the site for the study requires a participant email upon enrollment and one has not been provided, you will be asked to add one.
After the study is selected, any study and site specific enrollment fields will be displayed for collection.
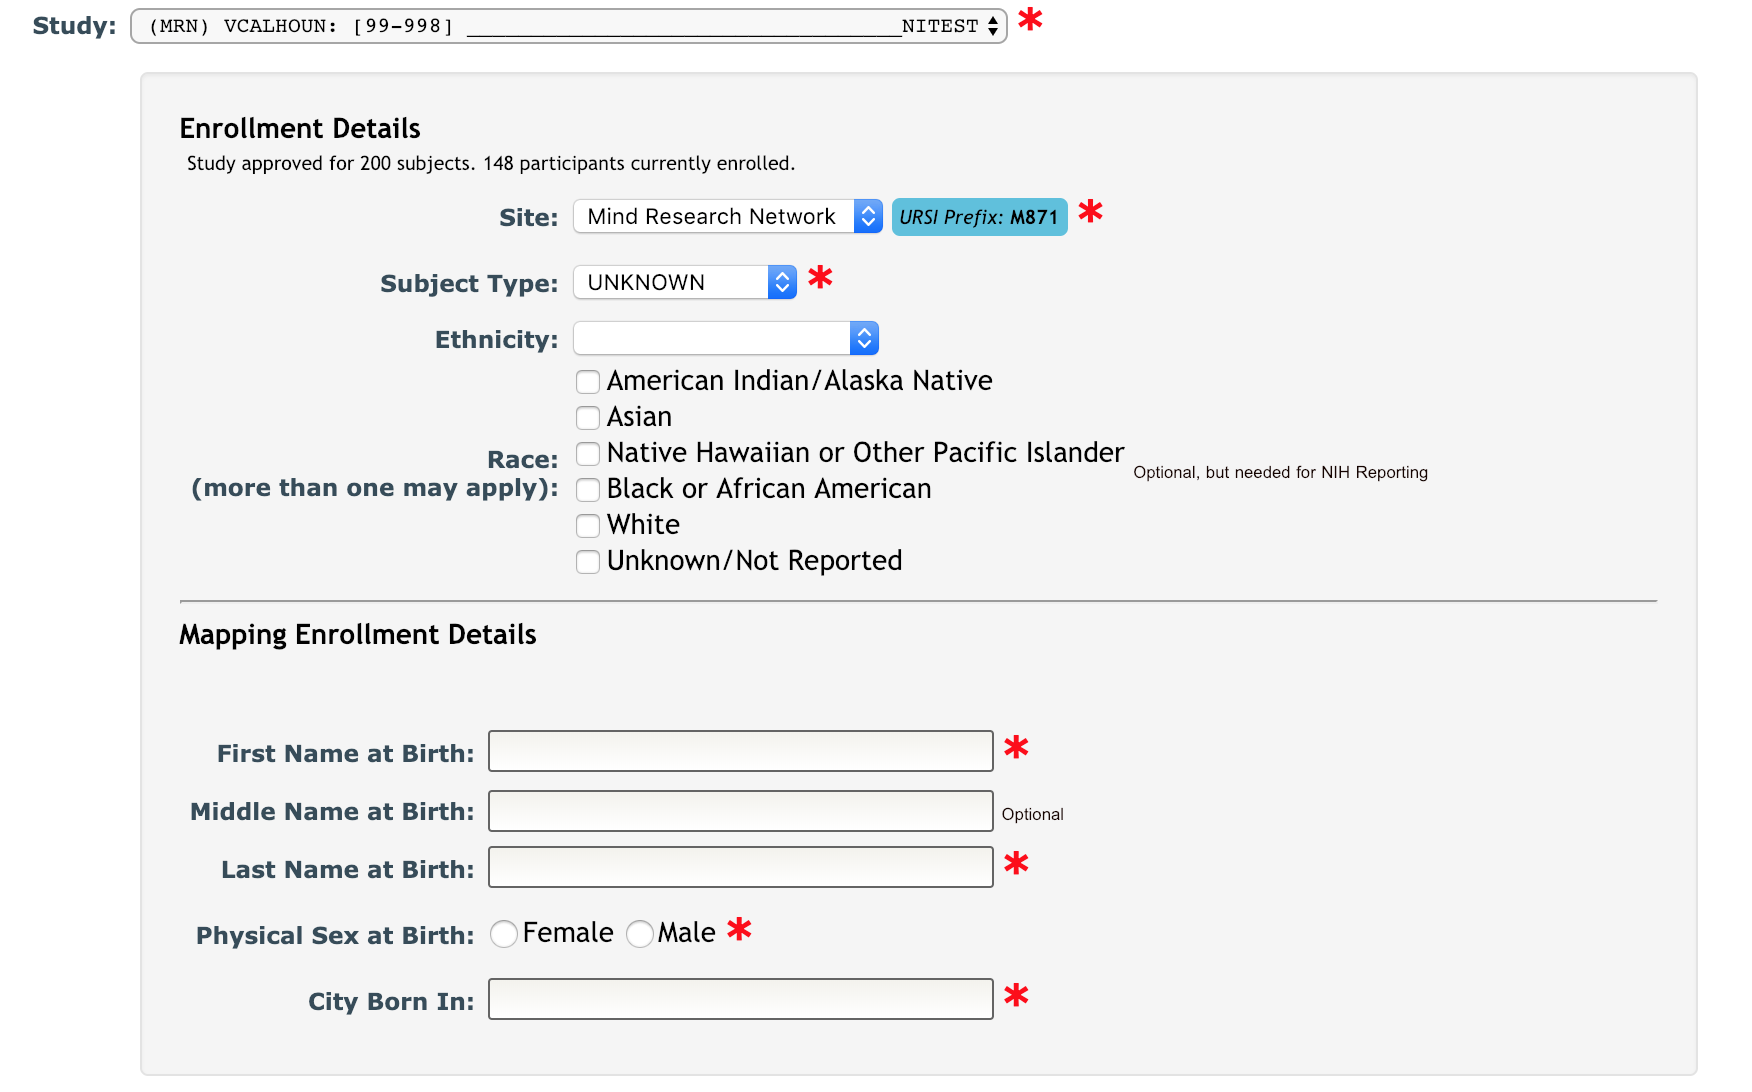
- Site - If your study is a multi-site study, choose which site to enroll your subject into. The URSI prefix assigned will depend on the site chosen. Each study will have a default site, but this can be changed by choosing a different site from the drop down list. The URSI prefix for the selected site will be listed. Click here for more information about adding multiple sites to your study.
- Subject Type - After your site is chosen, you can also chose a Subject Type.
- Ethnicity (optional and only if enabled through study details) - this can be exported for NIH reporting
- Race (optional and only if enabled through study details) - more than one may be selected and this can be exported for NIH reporting
- NDA Study specific enrollment information - If your study has been indicated as an NDA study, you will need to enter NDA specific information that is required to GUID creation which are First, Middle and Last name at birth, physical sex at birth, and city born in. If your study is not an NDA study, these options will not be not be visible. Enabling NDA specific features can be done through Edit Study Details.
- Consent Date - The date will automatically populate the current date. If the subject was consented on a different date, this can be changed.
- Assent Date - If the study involves minor subjects, assent dates can be enabled on the Study Details page. The date will automatically populate the current date. If the minor subject was consented on a different date, this can be changed.
- Subject agrees to share their data? - If you have language in your consent form that indicates to subjects that their data will be shared with other researchers you can select Yes for this question. If your consent form does not have this language you will select No. There is an Unknown option as well, but it is strongly recommend that you have this information available when enrolling. Note: selecting Yes will not share any data. This is used indicate to the investigator which data can be shared when ready for data sharing.
- Subject agrees to be contacted for future studies? - Indicate if the subject agreed that they wanted to be contacted for future studies. Choose if the subject chose Yes or No to this question in their consent form. Unknown will always be selected by default.
Once you have completely entered the information, select Continue.
Step 4: Verification and Matching
You will now be prompted to review the subject data that you have just entered. If applicable, NDA specific information will also be displayed.
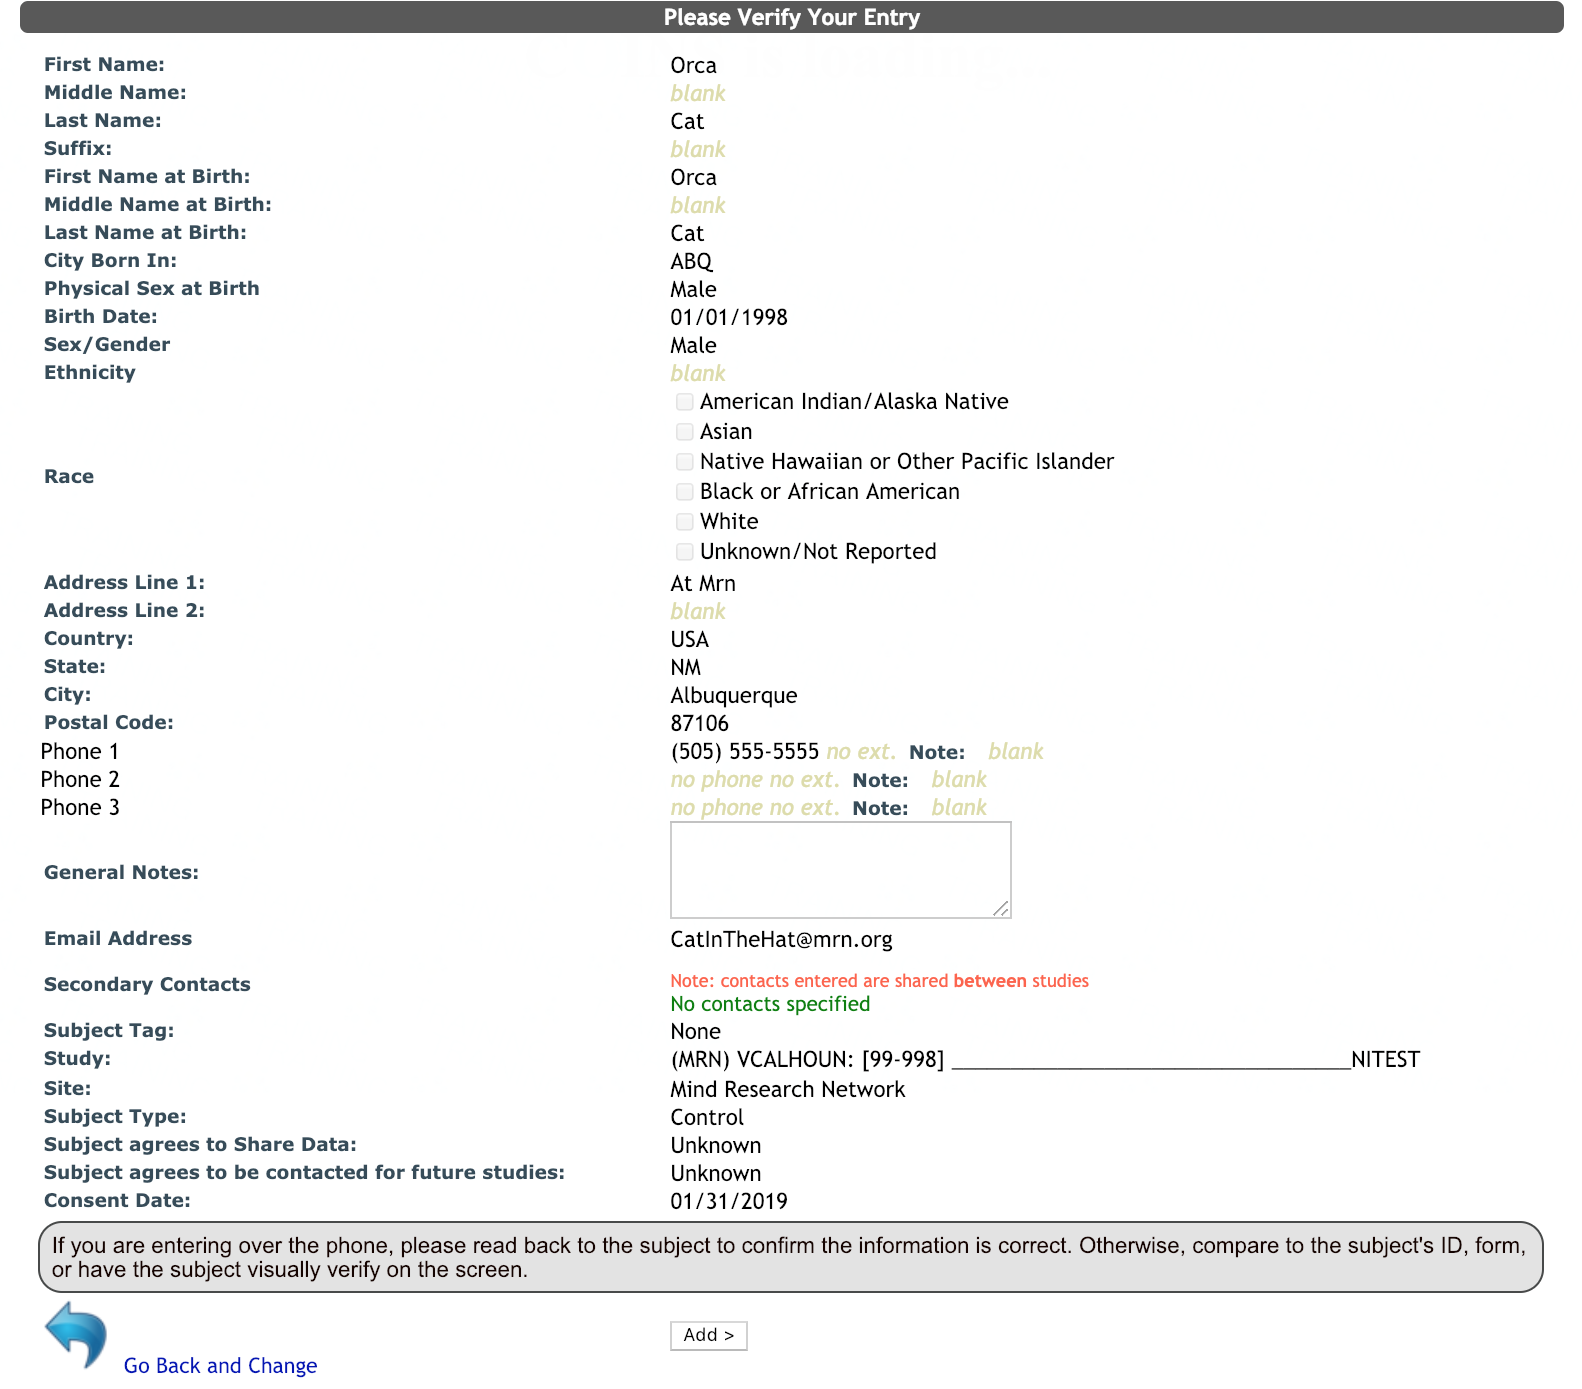
If you notice an error you can click on Go Back and Change to update or correct your entry. If you have all of the correct information, click Add and an URSI will be created for your subject. If you would once again like to review the information you entered you can click on the URSI and you will be directed to the subject details page for the subject. Note: the system will never display the URSI and the subject’s information on the same screen. This helps strengthen security of PHI.
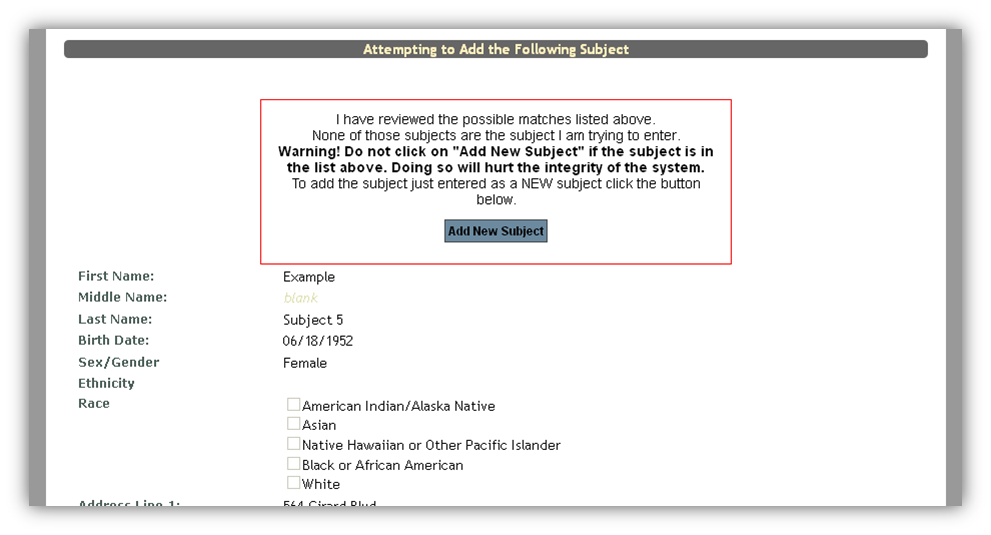
If you do not see your subject on the match list you will click Add New Subject from the screen below, and you will be given an URSI for your subject.

If you inadvertently enroll a subject in the wrong study, contact your site administrator to assist you in correcting the enrollment.
Match List

If the subject or birth date entered matches another subject that is already in MICIS you will be prompted to review the matching subjects. If you see the subject you are trying to enter on this list you will click Enroll next to that subject’s name, and an URSI will be created for your subject. If the subject already exists in a study you have permissions to, you can also click View. If you do not have permission to the subject you will see a *. If your subject is not on the Match List, scroll down and click Add New Subject.
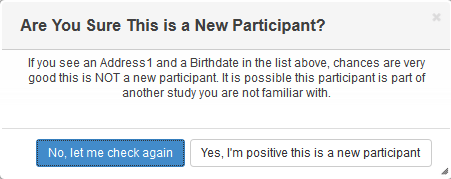
You will be asked a final time if you are sure the participant is new. Click No, let me check again to go back or Yes, I'm positive this is a new participant if you are sure this participant is not in the system yet.
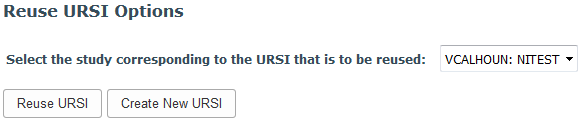
If you are enrolling a subject that already exists in the database and your study and the study they are already enrolled in have URSI sharing permission, you can can either choose Reuse URSI if you want to keep the same URSI or Create New URSI to make a new one for this study.
If the details you have entered do not match the subject's existing details, you will be asked to resolve the mismatches. Choose the correct and current information for the subject and click Submit.

Comments