Entering participants one-by-one through the MICIS tool can be can be time consuming for studies importing legacy data. Due to this, participants can be imported in batches by using the participant import tool. This tool is available for site admins only.
To access this tool, click Import Participants from CSV from the Subjects menu. It is important to remember that the subjects imported by this tool will not undergo subject matching. This means there are no checks to ensure the subjects do not already exist in the system.

Click Generate Participants Import Template to download the import template csv. Each column will be denoted as required (R) or as optional (O). Sample data will also be provided. The file must be saved as a CSV for it to upload.

Carefully complete the required fields for each participant you are importing, starting with the personal information in columns A through O.
- Import ID (required) - this is the ID that will link the participant in the csv to the URSI generated
- Suffix (optional) - subject’s name suffix
- First Name (required)
- Middle Name (optional)
- Last Name (required)
- Birthdate (required) - in MM/DD/YYYY format
- Gender (required) - in M/F format
- Address Line 1 (required)
- Address Line 2 (optional)
- City (required)
- State (required) - in state abbreviation (XX) format (ex: New Mexico = NM)
- Zip (required)
- Country (required) - in country abbreviation (XXX) format (ex: United States = USA)
- Notes (optional)
- Email Address (required)
Next, complete sharing information and phone information for the participant (columns P - Y) . Up to two phone numbers can be imported.

- Subject Agrees to Share Data (required) - indicate if the subject agrees to share data in their study consent in Y/N/U format
- Y - yes
- N - no
- U - unknown
- Consent Date (required) - the date the subject was consented in MM/DD/YYYY format
- Area Code1 (required) - area code for phone number 1
- Phone1 (required) - number for phone number 1
- Ext1 (optional) - extension for phone number 1
- Note1 (optional) - note for phone number 1
- Area Code2 (optional) - area code for phone number 2
- Phone2 (optional) - number for phone number 2
- Ext2 (optional) - extension for phone number 2
- Note2 (optional) - note for phone number 2
Lastly, complete ethnicity and race data (columns Z - AE). Ethnicity is required, but can be marked as "unknown". Race is not required.

- Ethnicity (required) - numeric formatting, click Show Ethnic Categories to see the category listing and choose from the following:
- 1 - Hispanic or Latino
- 2 - Not Hispanic or Latino
- 0 - Unknown/Not Reported
- American Indian/Alaska Native (optional) - denote with an "X"
- Asian (optional) - denote with an "X"
- Native Hawaiian or Other Pacific Islander (optional) - denote with an “X”
- Black or African American (optional) - denote with an "X"
- White (optional) - denote with an "X"
- Unknown/Not Reported (optional) - denote with an "X"
Once the CSV is complete, select a study from the drop down. After selecting a study, you will be able to choose the subject type and site for the participants being imported.
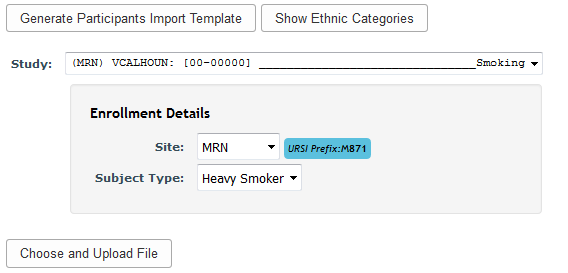
Click Choose and Upload File to import the participants. The results will be listed for the import.
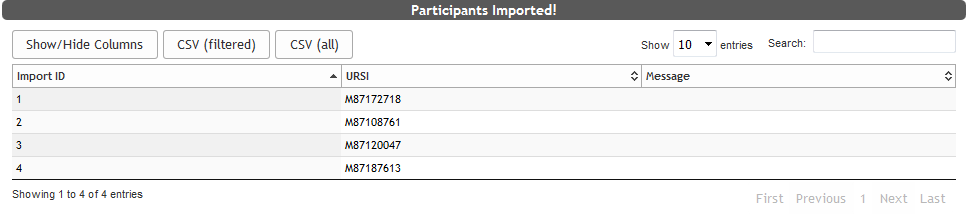
Participants who are imported successfully will have a link between import ID and URSI (ex: import_id: 2 matches ursi: MXXXXXXXX). It's important that you save this link, as it cannot be regenerated again. Click CSV (all) to download the results with the link.
Comments