To manually add an MEG scan, click Add an MEG Session from the Imaging menu.
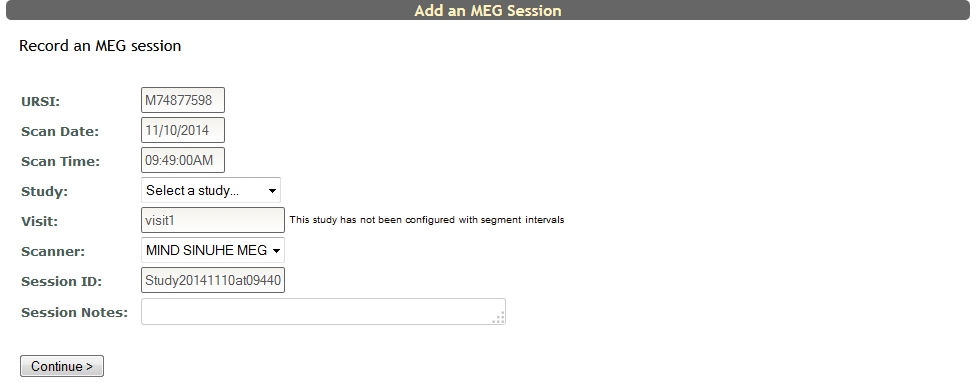
Here you will need to complete the following fields to manually add a scan session:
- URSI
- Scan Date - current date is automatically populated and should be adjusted to reflect your scan's date
- Scan Time - current time is automatically populated and should be adjusted to reflect your scan's time
- Study - choose from the list of studies the subject is enrolled in from the drop down menu
- Visit - "visit1" is automatically populated for any studies that have not added Study Visits and intervals, but can be adjusted to reflect your scan's proper visit. If your study does have Study Visits and intervals set up, select the correct one from the drop down list. Click Add a new visit to list to list the visit as something other than a visit that has been set up. Click Use an existing interval to return to the study's visit list.

- Scanner - choose the proper scanner from the drop down list
- Session ID - this session ID is created from the scan's date and time, the current date and time is automatically populated and should be adjusted to reflect the scan's proper date and time
- Session Note - any relevant notes can be added here
When all the information has been completed, select Continue>. You will be asked to review your scan information prior to adding the scan.
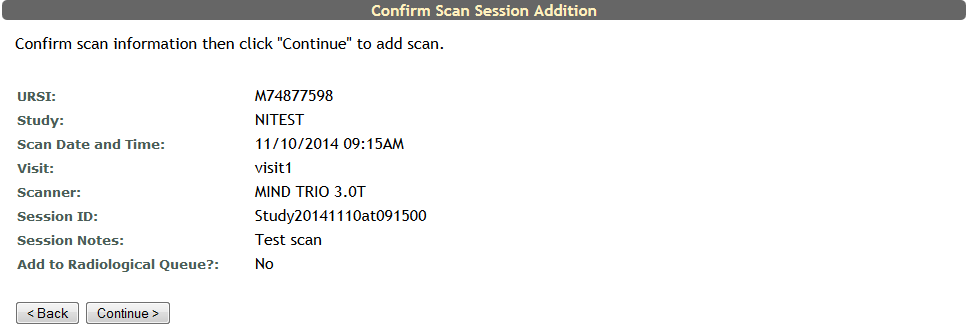
Confirm the scan information by clicking Continue>. Select <Back to make edits or cancel adding the scan. If you are told, "URSI not enrolled in selected study. Enroll the subject in the study then return to resume this scan." make sure you are using the correct URSI for the study. Since all studies the subject is enrolled in that you have access to will appear in the drop down list, it is possible the subject could have different URSIs across studies. If the scan was successfully added you will be prompted with this information.

Now click Edit Series to add individual runs.
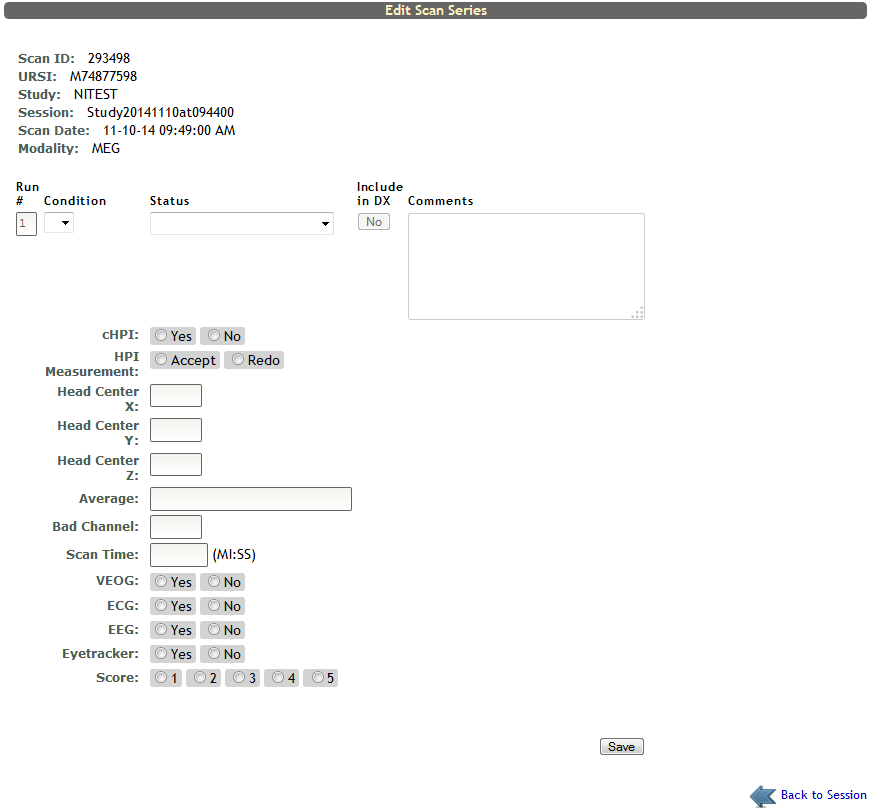
From this Edit Scan Series page you can add key details from the scan.
- Run # - the order the run was in the scan
- Condition - choose from possible scan protocols from a drop down list
- Status - choose the status of the run from a drop down list
- Completed – No problems
- Completed – Problems
- Incomplete
- Include in DX - toggle the Yes/No button to include the scan in Data Exchange (study sharing permission permitting)
- Comments
- cHPI - select Yes or No
- HPI - select Accept or Redo
- Measurement Head Center X
- Measurement Head Center Y
- Measurement Head Center Z
- Average
- Bad Channel
- Scan Time - MI:SS
- VEOG - select Yes or No
- ECG - select Yes or No
- EEG - select Yes or No
- Eyetracker - select Yes or No
- Score - select score from options 1 - 5
Click Save to add the run. Continue to do this until all of the runs for the scan have been added. Click Back to Session to return back to the previous page.
Comments