With the DICOM Quality Control (QC) tool you can set parameters for each series’ individual DICOM headers. After setting the parameters you can view the statistics across the all of the scans in the study for each rule that you set (rules are series specific). To access the tool, click on Manage Series Labels from the Imaging menu and select the study you wish to manage. It is available for those with coordinator access and above or those with MR Tech permissions.
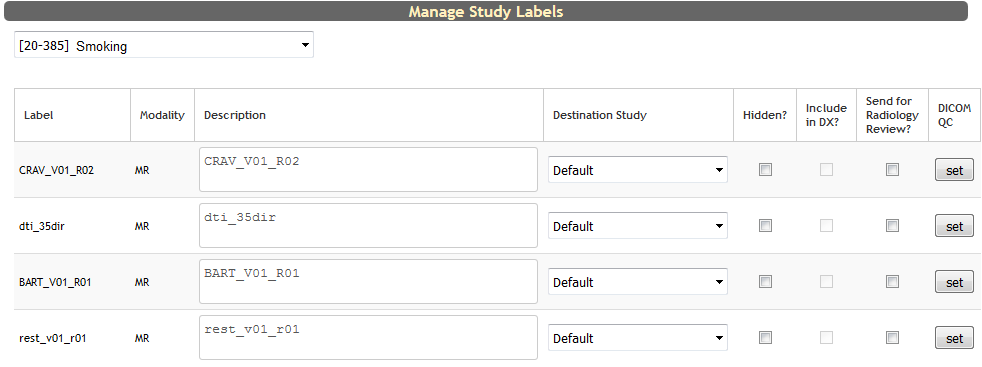
Click set under DICOM QC for the series you want to set parameters for.
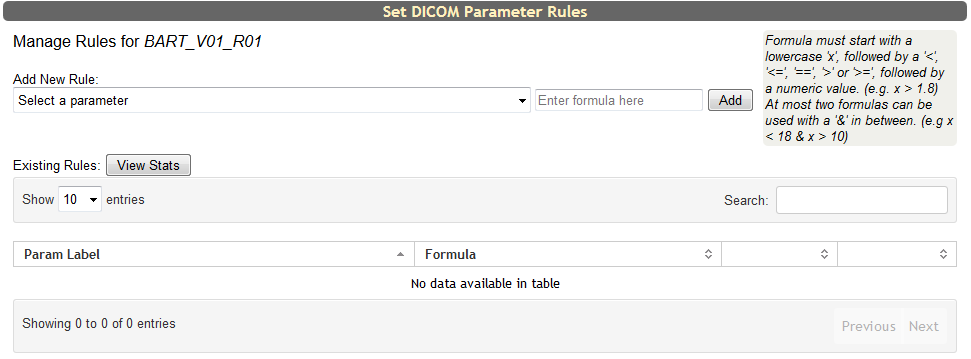
To begin, select a parameter from Add New Rule. After you have selected a parameter, enter in the formula for data ranges or points you expect. Data that falls outside of these formulas will be considered outliers.

Formula must start with a lowercase 'x', followed by a '<', '<=', '==', '>' or '>=', followed by a numeric value. (e.g. x > 1.8) At most two formulas can be used with a '&' in between. (e.g x < 18 & x > 10). Click Add to add the rule.

Continue to add as many rules as needed. To edit a rule, click Modify and the Formula column will then be editable. Click Update to save your edits. Click Del to remove any rules.
Once your rules have been added, click View Stats to see your results.

Now you will be able to see a table with all of the chosen series, coded as Normal, Outlier or N/A for the parameter chosen. Hover over the series block to see the value of the parameter.

Click on the parameter label to view a more comprehensive graph of the parameter values.
 Hover over a bar to see details about that series.

Click Show Outliers to see only those that are outliers.
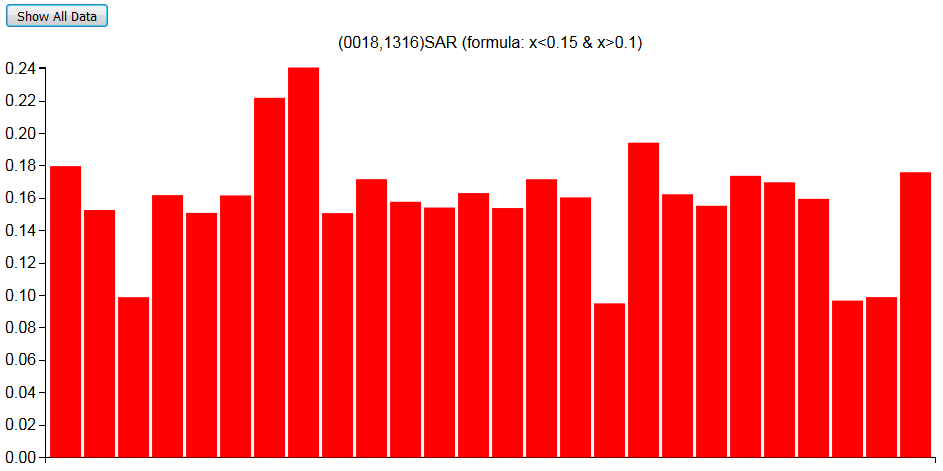
These bars can also be hovered over to view their details. Click Show All Data to return to the previous view.
Comments